DIY Christmas Luminaries Mason Jar: 16 Glowing Ideas
There is nothing quite like the soft glow of a mason jar luminary on a December evening. A plain glass jar, a flickering light, and a little creativity turn into the warmest decoration in your whole house — and the best part is that you probably already have everything you need sitting in a kitchen cabinet. DIY Christmas luminaries made from mason jars are cheap, endlessly customizable, and so simple that even a first-time crafter can finish one in under an hour.
This guide walks you through sixteen beautiful DIY Christmas luminaries mason jar designs, from snowy Epsom salt jars and sparkling glitter jars to painted stained-glass looks and tiny glowing Christmas villages. Every idea includes what you need, how to make it step by step, and how to display it safely. One important rule runs through the whole guide: always use battery-operated LED tea lights inside your jars, never real candles with an open flame. LED lights give you the same warm flicker with zero fire risk, and they last for hours on a single battery.
1. Classic Snowy Epsom Salt Mason Jar Luminary
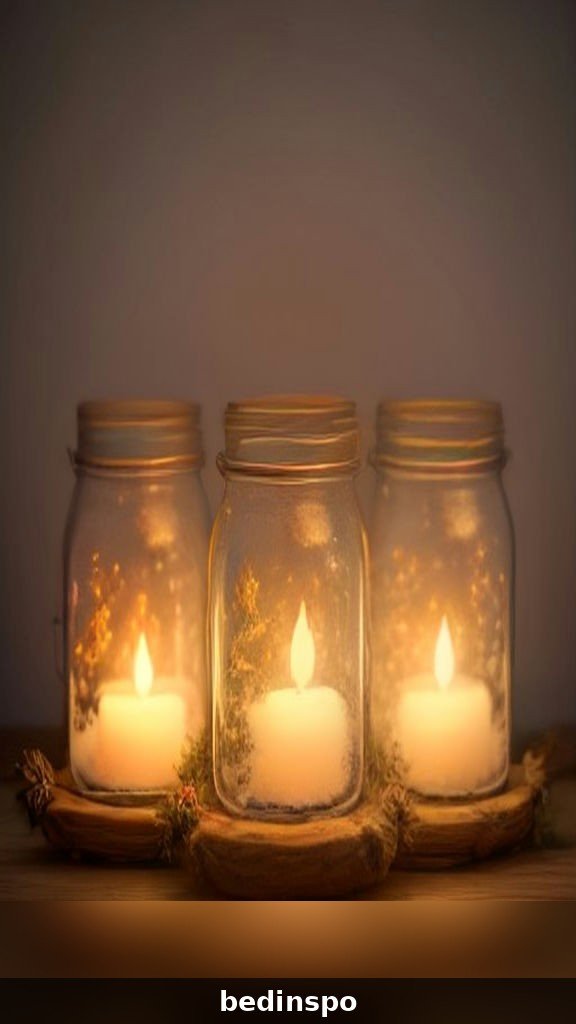
The snowy Epsom salt jar is the project that started the whole mason jar luminary craze, and it is still the prettiest. Brush the outside of a clean mason jar with a thin, even coat of Mod Podge or white craft glue, then roll it in Epsom salt until it is fully coated. The salt crystals catch the light from inside the jar and scatter it like fresh snow, giving the whole jar a soft, frosted glow that looks magical on a mantel or windowsill.
Let the jar dry completely — at least two hours — before you drop in an LED tea light. For extra charm, tie a strip of burlap or red plaid ribbon around the neck and tuck in a tiny pine sprig. These jars look best in groups of three in different sizes, and they cost less than a dollar each to make. If the salt starts to flake after a season in storage, just brush on a fresh coat of glue and re-roll; the jar itself lasts forever.
2. Sparkling Glitter Mason Jar Luminary
Glitter jars are pure holiday glamour. Pour a spoonful of fine gold or silver glitter into the jar, add a squirt of Mod Podge, and swirl it around until the inside walls are coated, then pour out the excess and let it dry upside down. When you switch on an LED tea light, the glitter throws hundreds of tiny sparkles across the room, and the effect is honestly breathtaking in a darkened living room.
Use fine glitter rather than chunky flakes for the smoothest, most even glow. Gold glitter reads warm and classic, silver reads icy and modern, and a mix of champagne and rose gold looks straight out of a boutique. Seal the inside with a second thin coat of Mod Podge once the glitter is dry so it never sheds. These jars double as beautiful centerpieces at a Christmas dinner table, especially when you mix them with fresh greenery and a few pinecones.
3. Painted Stained-Glass Mason Jar Luminary
A stained-glass look sounds advanced, but it is one of the easiest painted luminary techniques there is. Draw a simple design on the outside of the jar with a black glass paint liner or a permanent marker — think stars, snowflakes, holly leaves, or simple geometric panels. Then fill in the shapes with translucent glass paint in red, green, gold, and blue, using a small brush and letting each color dry before you touch the next one.
The light from an LED tea light shines through the translucent paint like a real church window, and the effect is stunning on a dark winter evening. If freehand drawing feels intimidating, trace a printed design held inside the jar, or use peel-and-stick stained-glass stickers as your outlines. Keep the paint thin; thick coats block the light. A set of four painted jars in coordinating colors makes a gorgeous gift for a neighbor or teacher.

4. Decoupage Winter Scene Mason Jar Luminary
Decoupage turns a plain jar into a tiny winter storybook. Cut out images from Christmas napkins, wrapping paper, or printed tissue paper — snowy trees, reindeer, cardinals, snowflakes — and glue them onto the outside of the jar with Mod Podge, smoothing out every bubble with your fingers or a foam brush. Once the first layer dries, brush two more thin coats of Mod Podge over the top to seal everything in place.
The trick is to use thin paper: regular printer paper is too thick and will look cloudy when the light shines through, while tissue and napkin layers turn beautifully translucent. White and pale blue scenes glow best, because dark images block too much light. Layer a few small snowflakes over a larger tree scene for depth. This is a wonderful project to do with older kids and teens, since there is no cutting glass or handling anything hot — just paper, glue, and imagination.
5. Pine and Berries Mason Jar Luminary
Sometimes the simplest design wins. Fill the bottom third of a wide-mouth mason jar with a layer of fresh pine sprigs, a few red berries, and a small pinecone, then set a battery LED tea light on a little glass votive holder or a small upside-down jar lid in the center so the flame sits above the greenery. The greenery frames the light beautifully, and the whole jar smells faintly of a Christmas tree.
Use faux berries and greenery if you want the arrangement to last all season, or fresh clippings if you love the scent and do not mind swapping them out weekly. Never place a real candle flame near dried greenery — this is exactly why LED tea lights are non-negotiable in this guide. Tie twine around the neck and add a cinnamon stick for a finishing touch. These jars are perfect for a Christmas dinner table because the greenery echoes the rest of your table decor.

6. Mini Christmas Village Mason Jar Luminary
A tiny Christmas village inside a mason jar is the project everyone will ask about. Start with a layer of fake snow or Epsom salt in the bottom of a wide-mouth jar. Add a miniature bottle-brush tree, a tiny house or church figure from the dollar store, and a sprinkle of miniature fake snow. Then drop in a warm-white LED tea light behind the little scene, and the whole village glows like a snow globe.
Hot-glue the little figures to a small cardboard circle cut to fit the jar bottom so the scene stays put when you move the jar. Keep the figures low and the light behind them so the silhouettes show through the glass. A row of three village jars down a mantel or windowsill looks like a whole glowing town, and each one can tell a different story — a church, a cabin, a little shop. Kids love choosing the figures, and the jars make unforgettable handmade gifts.
7. Frosted Pinecone Mason Jar Luminary
For a woodland look, glue a ring of small pinecones around the outside of a mason jar, or simply fill the jar with miniature pinecones and set an LED tea light in the middle. Frost the pinecones first with a dusting of white spray paint or a brush of white craft paint on the tips, and they look like they were just carried in from a snowy forest.
If you are gluing pinecones to the outside, use a hot glue gun and hold each cone in place for ten seconds until the glue sets. Space them evenly and fill the gaps with tiny sprigs of faux pine or a few red berries. This design looks especially beautiful in larger quart-size jars, where the scale of the pinecones feels just right. Pair it with a plaid ribbon and it becomes the most rustic, cabin-style luminary in your whole collection.

8. Cranberry and Candle Mason Jar Luminary
Fresh cranberries floating in water with a light glowing above them is one of the most elegant Christmas table decorations you can make, and it takes five minutes. Fill a mason jar two-thirds full with water, drop in a handful of fresh cranberries and a few sprigs of rosemary or pine, then float a battery-operated LED tea light on top. The red berries, green sprigs, and warm light create a jewel-toned centerpiece that looks far more expensive than it is.
Change the water every two or three days to keep the berries fresh, and keep the jar out of direct sunlight so the water stays clear. For a dinner party, make one jar per place setting as a personal centerpiece guests can take home, or line up a row of them down the center of the table. Frozen cranberries work too and keep the water cold, which helps the arrangement last even longer. This is the luminary to make when you need something gorgeous in a hurry.
9. Rustic Burlap and Twine Mason Jar Luminary
Burlap and twine give a mason jar luminary a warm farmhouse feel that fits perfectly with rustic Christmas decor. Wrap a strip of burlap around the middle of the jar and secure it with a dab of hot glue, then wrap twine around the neck three or four times and tie it in a simple bow. Cut a small star or tree shape out of felt or kraft paper and tuck it under the twine for a handmade touch.
The burlap softens the light and gives it a warm, honeyed glow that looks wonderful on a farmhouse mantel or a wooden dining table. You can also punch tiny holes in a strip of tin or use a burlap ribbon with a printed Christmas pattern for extra detail. Keep the burlap away from any heat source — another reason LED lights are the only safe choice. This design pairs beautifully with plaid table runners, wooden bead garlands, and other rustic holiday pieces.

10. Snowman Face Mason Jar Luminary
Snowman jars are pure joy, and they are the easiest luminary to make with kids. Paint the outside of a mason jar white with acrylic paint, or leave the glass clear and let the light do the work. Then use black paint or stick-on felt to add two coal eyes, a carrot nose cut from orange felt or painted on, and a row of small black dots for the smile. Tie a strip of red or green fabric around the neck as a scarf, and add a tiny hat made from a black felt circle and a small cylinder.
When the LED tea light glows inside, the snowman face lights up from within and looks absolutely delightful on a windowsill or a child’s bedside table. Make a whole snowman family in different jar sizes — pint, quart, and half-gallon — and line them up on the mantel. These jars also make sweet gifts for grandparents, who will love the handmade charm. Use acrylic paint rather than spray paint so the project stays kid-friendly and fume-free.
11. What You’ll Need: The Universal Luminary Toolkit
Almost every luminary in this guide uses the same basic supplies, so gather them once and you can make all sixteen designs. Here is the complete toolkit, and most of it costs under twenty dollars total.
- Mason jars — pint and quart sizes, wide-mouth is easiest to work with; thrift stores sell them for pennies
- LED tea lights — battery-operated, warm white; buy a multi-pack with a remote or timer if you can
- Mod Podge — matte or glossy, the glue-sealer that holds glitter, salt, and decoupage in place
- Epsom salt, glitter, and acrylic or glass paint — your three main decorating materials
- Hot glue gun with extra sticks — for pinecones, figures, and anything that needs a firm hold
- Ribbon, twine, and burlap — for necks, bows, and finishing touches
- Small brush, foam brush, and scissors — for painting, gluing, and cutting paper and fabric
- Miniatures and greenery — bottle-brush trees, tiny houses, pine sprigs, berries, and pinecones
Buy your LED tea lights in bulk — a pack of twenty-four usually costs less than ten dollars and will light every jar in this guide with spares left over. Choose warm white rather than cool white for the coziest glow, and look for tea lights with a flicker mode, which mimics a real candle flame far better than a steady light.

12. Step-by-Step: The Epsom Salt Snow Jar
Start with a clean, dry mason jar — any soap residue will stop the glue from sticking. Brush a thin, even coat of Mod Podge over the outside of the jar, working in sections so the glue does not dry before you add the salt. Pour Epsom salt onto a paper plate, roll the jar through it, and press gently so the crystals stick. Set the jar upside down on wax paper and let it dry for at least two hours.
Once dry, tap off any loose salt and brush a light coat of clear spray sealer over the outside to lock the crystals in place. Add your ribbon and pine sprig, drop in an LED tea light, and switch it on. That is the whole project — twenty minutes of work and two hours of drying for a luminary that looks like it came from a high-end holiday shop. Make them in batches: while one jar dries, start the next, and you can finish a whole set in a single afternoon.
13. Step-by-Step: The Painted Glass Jar
Wash the jar with soap and water, then wipe it with rubbing alcohol to remove any grease so the paint grips the glass. Sketch your design lightly on the outside with a dry-erase marker first — snowflakes, stars, or simple stripes — so you can wipe away mistakes before you commit. Then trace the lines with black glass paint liner and let it dry for an hour.
Fill in the shapes with translucent glass paint, using a small flat brush and thin coats. Let each color dry for thirty minutes before adding the next, and do not overload the brush — puddles of paint dry cloudy and block the light. Once everything is dry, bake the jar in a cool oven according to your paint brand’s instructions if you want the design to be permanent, or simply leave it as is for a seasonal decoration. Drop in your LED tea light and enjoy the stained-glass glow.

14. Candle Safety: Why LED Tea Lights Only
This is the most important section in the whole guide, so read it carefully. A real candle flame inside a mason jar is dangerous: the glass traps heat, dried greenery and paper decorations can catch fire, and a jar that has been heated can crack or shatter. Every design in this guide is made to be used with battery-operated LED tea lights, and that rule has no exceptions — not even for a quick photo.
LED tea lights are cheap, safe, and honestly look better than real candles in a jar because they never drip wax or smoke. Choose flameless candles with a flicker mode and a built-in timer so your luminaries switch themselves on at dusk and off at bedtime. Keep the battery compartment dry, replace batteries at the start of the season, and store spare batteries away from children. If you are placing luminaries on a porch, use LED lights rated for outdoor use or bring the jars inside during rain. And always keep any luminary — even an LED one — out of reach of small children and pets, since the glass itself can break if knocked over.
15. Table Display Ideas for Mason Jar Luminaries
On a Christmas dinner table, mason jar luminaries work best in odd-numbered groups down the center, mixed with fresh greenery. Lay a garland of pine or eucalyptus down the middle of the table, tuck three luminaries of different heights into it, and scatter a few pinecones and red berries around the base. The glow from the jars will light the faces of everyone at the table, and the whole arrangement costs a fraction of a store-bought centerpiece.
For a buffet or dessert table, place a single luminary at each end to frame the food, and use smaller jars as place markers — one per guest, with a tiny name tag tied to the neck. On a coffee table, group two luminaries on a wooden tray with a small stack of books and a sprig of pine for a cozy vignette that takes thirty seconds to arrange. The key is variety: mix sizes, mix designs, and mix heights by setting some jars on small stacks of books or wooden blocks so the glow falls at different levels.

16. Porch, Window, and Mantel Display Ideas
On a front porch, mason jar luminaries turn a plain entryway into a welcoming glow. Line them along the steps, two or three per step, or hang them from shepherd’s hooks with wire handles twisted from floral wire. Use LED tea lights with timers so they switch on at dusk automatically, and bring the jars inside during heavy rain or snow so the decorations stay fresh.
On a windowsill, a row of luminaries glows beautifully from the street and looks magical from inside the house too — it is the rare decoration that works both ways. On a mantel, anchor the display with a tall luminary at each end and smaller ones in the middle, weaving in garland and stockings. Vary the designs so the mantel does not look matchy-matchy: a snowy jar, a glitter jar, and a village jar together look collected and charming rather than store-bought. And remember to check the batteries once a week so the glow never fades mid-evening.
17. Making Your Luminaries Last and Storing Them
A well-made mason jar luminary should last for many Christmases. The secret is storage: wrap each jar individually in tissue paper or a soft cloth so the decorations do not scratch each other, and store them upright in a sturdy box with dividers — a wine box with cardboard dividers works perfectly. Remove the LED tea lights and store them separately so the batteries do not leak over the summer.
Before you pack them away, dust each jar gently and check for loose glitter, salt, or pinecones, touching up any worn spots with a dab of Mod Podge. Label the box clearly so you can find your luminaries in November without digging through every holiday bin. Faux greenery and painted designs store best in a cool, dry place; fresh greenery and cranberry arrangements are seasonal and should be composted after the holidays. With a little care, your favorite jars will glow just as beautifully next December as they did the first year.

18. Luminaries as Gifts and Budget Tips
Mason jar luminaries are one of the best handmade Christmas gifts because they look expensive and cost almost nothing. A finished luminary, wrapped in cellophane with a ribbon and a handwritten tag, is a gift anyone would be happy to receive — and you can make a dozen of them for the price of one store-bought candle. Make a few extras in November so you always have a last-minute gift ready for a hostess, a teacher, or a neighbor.
To keep costs down, buy mason jars at thrift stores or save jars from pasta sauce and pickles — any clean glass jar works, not just branded mason jars. Dollar stores carry bottle-brush trees, miniature houses, ribbon, and LED tea lights for a dollar each. Buy your glitter, Mod Podge, and paint during craft store sales, and split supplies with a friend so you both get variety without buying full bottles of everything. A full set of sixteen luminaries can easily cost under thirty dollars total, which is less than a single fancy candle from a home decor store.
Frequently Asked Questions
Can I use real candles in a mason jar luminary?
No — always use battery-operated LED tea lights. Real flames inside a closed glass jar trap heat, can crack the glass, and can ignite dried greenery, paper, or fabric decorations. LED tea lights give you the same warm flicker with zero fire risk, and modern flickering LEDs look remarkably like real flames.

What size mason jar works best for luminaries?
Pint jars are the most versatile size for table displays and gifts, while quart jars make a bigger statement on mantels and porches. Wide-mouth jars are easier to decorate and to fit your hand inside, especially for village scenes. Half-pint jars are adorable as place settings or in groups of three on a windowsill.
How do I keep glitter and Epsom salt from falling off?
Seal them. After your glitter or salt layer is fully dry, brush on a thin coat of Mod Podge or spray a light coat of clear sealer over the outside. Let it dry completely before handling the jar, and store wrapped jars in tissue so the coating does not rub off in the box.

Can mason jar luminaries go outside on the porch?
Yes, with care. LED tea lights are safe outdoors, but the jars themselves should be sheltered from heavy rain and snow, which can soak paper and fabric decorations. Place them under a covered porch, bring them in during storms, and use outdoor-rated LED lights if you leave them out overnight.
How long do LED tea lights last?
A single CR2032 battery usually powers an LED tea light for 48 to 100 hours depending on the brand and brightness setting. Tea lights with a built-in timer last much longer in practice because they switch themselves off after four or six hours. Keep spare batteries on hand and test every light before your Christmas party.

What is the easiest luminary for a complete beginner?
The snowy Epsom salt jar from section 1 — brush on glue, roll in salt, let it dry, add a light. There is no painting, no cutting, and no technique to learn, and it looks stunning. The cranberry water jar from section 8 is the second-easiest, taking about five minutes from start to finish.
Can I make luminaries with kids?
Yes, and they make wonderful family craft projects. Stick to the snowman jars, glitter jars, and decoupage jars, which use only glue, paint, and paper. Adults should handle the hot glue gun, and everyone should use LED lights only. Give each child their own jar so they can decorate it their way.

How do I clean a mason jar luminary after Christmas?
Remove the LED light and any fresh greenery first. Wipe the outside with a dry cloth to remove dust. For glitter or salt jars, do not wash them under running water — the coating will dissolve. Painted jars can be wiped gently with a damp cloth. Store each jar wrapped in tissue, upright, in a labeled box.
Conclusion
DIY Christmas luminaries made from mason jars are proof that the prettiest holiday decorations are often the simplest ones. A jar you already own, a few dollars of craft supplies, and an LED tea light turn into a warm, glowing centerpiece that makes your whole home feel like Christmas. Start with one design that catches your eye — the snowy Epsom salt jar is a perfect first project — and before you know it, you will have a whole glowing collection for your table, your mantel, and your porch.
Save this guide to your Christmas crafts board so you can find it again next year, and share it with the friend who loves a good dollar-store craft. Then light up your jars, turn down the lamps, and enjoy the glow — you made that, and it is beautiful. Merry Christmas, and happy crafting.


Related Reads
- DIY Christmas Wreath Ideas — 16 beautiful wreath tutorials for your front door
- Wooden Bead Christmas Garland DIY — a rustic garland to pair with your glowing jars
- Dried Orange Garland Christmas — a fragrant, natural garland for the mantel
- DIY Parol Christmas Lantern — another glowing lantern project for the holidays