25 Stained Glass Christmas Cookies
25 Stained Glass Christmas Cookies
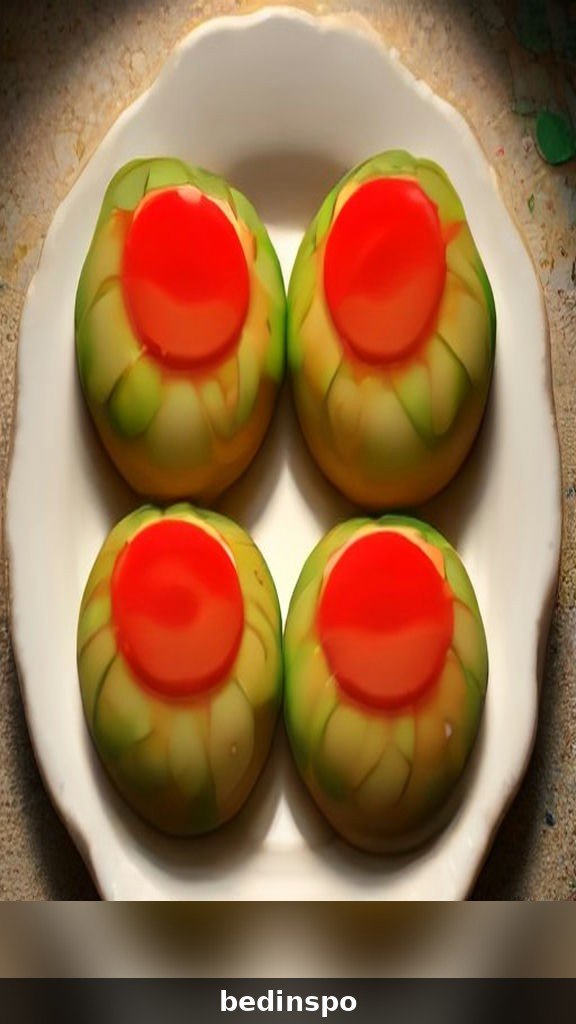
There is no cookie more magical on a Christmas tree than a stained glass cookie. The sugar cookie frame is crisp and buttery, and the center is a window of colorful crushed candy that melts into glass in the oven. Hold one up to the light and it glows like a tiny cathedral window — red, green, gold, and blue, all sparkling at once. These cookies are as beautiful as they are delicious, and they are one of the most fun holiday cookies to make with kids.
This guide gives you twenty-two ways to make, shape, decorate, and enjoy stained glass Christmas cookies — from the classic round window cookie to wreaths, stars, tree ornaments, and gift tags. Whether you are baking for a cookie exchange, decorating the tree, or making edible gifts, these cookies are festive, fun, and unforgettable.
1. What Are Stained Glass Cookies?

Stained glass cookies are sugar cookies with a hole cut out of the center, filled with crushed hard candy that melts in the oven into a smooth, glass-like window. The candy hardens as the cookie cools, creating a transparent, colorful center that light shines through. The effect is exactly like a stained glass window, only edible — and much more delicious.
The cookies have been a holiday tradition for generations, and they are especially popular as tree ornaments because they are beautiful, lightweight, and last for weeks if they are kept dry. They are also a wonderful project for children, who love crushing the candy, choosing the colors, and watching the glass form in the oven. It is baking and crafting in a single recipe.
2. The Sugar Cookie Base
The base of this cookie is a sturdy sugar cookie dough that holds its shape in the oven. Unlike soft sugar cookies, stained glass cookies need a dough that does not spread much, or the windows will close up during baking. Use a dough with a higher ratio of flour to butter, and chill it thoroughly before rolling and cutting. A little cream cheese in the dough adds flavor and helps the cookies hold their shape.
Roll the dough to about a quarter inch thick — thick enough to hold the candy window, but thin enough to bake evenly. Cut the outer shapes with large cookie cutters, then cut the inner windows with smaller cutters. A round window in a star-shaped cookie is the classic look, but any combination of shapes works beautifully.
3. Choosing Your Hard Candies

The candy you choose determines the color of the glass, so pick bright, transparent hard candies. Classic fruit-flavored hard candies in red, green, yellow, and blue work beautifully, and they melt into clear, jewel-like windows. Avoid opaque candies, chocolate, or anything with a filling — they will not melt into glass and will make a sticky mess instead.
Sort the candies by color before you crush them, and keep each color in a separate bowl. A single color per window gives the cleanest, most beautiful effect, but mixing two colors in one window creates a lovely marbled look. Red and green are the classic Christmas combination, while gold and blue look elegant and wintry. Use about one candy per window, crushed, for a standard cookie.
4. Crushing the Candy Safely
Crushing hard candy is easy if you do it right. Place the candies in a sturdy zip-top bag, seal it with most of the air pressed out, and crush them with a rolling pin or a meat mallet. The bag keeps the shards contained, and the rolling pin gives you an even, fine crush. Aim for pieces about the size of coarse sand — too fine and the glass will be cloudy, too chunky and it will not melt evenly.
Always crush the candy in a bag, never loose on a cutting board — the shards fly everywhere and can be sharp. Wear safety glasses if you are crushing a large batch, and keep children away from the crushing step. Once the candy is crushed, store each color in a small bowl with a spoon so it is easy to fill the windows.
5. Cutting Out the Centers

Cutting out the centers is the most satisfying part of making stained glass cookies. After cutting the outer shape, use a smaller cookie cutter to cut a window in the center of each cookie. A round window is the easiest and most forgiving shape, but stars, hearts, and trees all look wonderful. Keep the windows at least a quarter inch from the outer edge, or the cookie frame will be too thin and fragile.
Save the small cut-out centers and bake them as mini cookies — they are delicious on their own and perfect for snacking while you work. If the dough gets too warm while you are cutting, chill it for fifteen minutes before continuing. Warm dough sticks to the cutters and loses its shape, while cold dough cuts cleanly and holds its edges.
6. Filling the Windows
Filling the windows is simple but requires a light touch. Place the cut-out cookies on a parchment-lined baking sheet, then spoon the crushed candy into each window until it is level with the top of the dough. Do not overfill — too much candy will bubble over the edges and stick the cookies to the baking sheet. A level fill melts into a smooth, even window.
Use a small spoon or your fingers to fill the windows, and brush away any stray candy pieces from the surface of the cookie. Stray pieces melt into spots on the dough that look messy and can stick to the pan. One color per window is the cleanest look, but a pinch of a second color in the center creates a beautiful marbled effect.
7. Baking Them Just Right

Stained glass cookies bake at a slightly lower temperature than most sugar cookies — 325 degrees is ideal. The lower temperature gives the candy time to melt fully into glass without burning, and it keeps the cookie edges from browning too much. Bake for ten to twelve minutes, and watch the windows closely in the last few minutes. The candy should be completely melted and bubbling gently when you pull the cookies out.
Let the cookies cool completely on the baking sheet before moving them. The candy glass is extremely hot when it comes out of the oven, and it needs at least fifteen minutes to harden. Moving the cookies too soon will crack the glass or smear it across the baking sheet. Patience is the hardest part of this recipe — and the most important.
8. The Clear Candy Glass Effect

The clear candy glass effect is what makes these cookies so magical. As the crushed candy melts, it flows together into a smooth, transparent sheet that hardens into glass as it cools. Hold the finished cookie up to a window or a Christmas light, and the colors glow — red like a ruby, green like an emerald, gold like honey. It is a small moment of wonder in an ordinary cookie.
For the clearest glass, use a single color of candy per window and do not stir the melted candy. Stirring introduces air bubbles that make the glass cloudy. If the glass does come out a little cloudy, it is still beautiful — the cloudiness looks like frosted glass, which is lovely in its own way. A few tiny bubbles are normal and add to the handmade charm.
9. Making a Hole for Hanging
If you want to hang your stained glass cookies on the tree, you need a hole for the ribbon. Use a straw or a wooden skewer to poke a small hole near the top edge of each cookie before baking. Make the hole at least a quarter inch from the edge, or the cookie will break when you hang it. The hole will shrink slightly during baking, so make it a little bigger than you think you need.
After the cookies have cooled completely, thread a ribbon, a piece of twine, or a loop of fishing line through the hole and tie it in a bow. Red ribbon is the classic choice, but gold ribbon looks elegant and twine looks rustic. Hang the cookies on the tree where the lights will shine through them — near the top of the tree, where the light is brightest, is the best spot.
10. Using Them as Tree Ornaments

Stained glass cookies make wonderful tree ornaments because they are beautiful, lightweight, and edible. They last for weeks on the tree if they are kept in a dry room, and they fill the tree with color in a way that glass ornaments cannot match. Hang them at eye level where people can see the light shining through them, and space them out so each one has room to glow.
Keep the cookies away from heat sources and humidity, which can make the candy glass sticky. A tree in a dry, heated room is fine, but a tree near a fireplace or a humidifier is not. At the end of the season, the cookies can be eaten — although after weeks on the tree they are better as a memory than as a snack. Make a fresh batch for eating and save the tree cookies for looking.
11. Stained Glass Wreath Cookies
A wreath-shaped stained glass cookie is one of the prettiest variations you can make. Cut a large circle, then cut a smaller circle out of the center to make a ring. Fill the ring with green crushed candy for a wreath effect, or fill the center hole with red candy for a berry-like look. The ring shape is sturdy and hangs beautifully on the tree.
Decorate the finished wreath cookies with a small red bow made from icing, or a tiny cluster of red candies glued on with a dab of royal icing. The wreath shape is also a lovely cookie to give as a gift — it looks like a miniature Christmas wreath, and it tastes like a buttery sugar cookie. It is the cookie that does double duty as a decoration and a dessert.
12. Stained Glass Star Cookies

Star-shaped stained glass cookies are a holiday classic. Cut a large star, then cut a smaller star out of the center and fill it with gold or yellow crushed candy. The gold window glows like a star on top of a tree, and the shape is sturdy enough to hang without breaking. These are the cookies to make if you only make one shape.
For a more dramatic look, fill the star window with a mix of red and gold candy. The two colors swirl together as they melt, creating a marbled effect that looks like a sunset. Star cookies also make wonderful gift tags — thread a ribbon through the hanging hole, write a name on the cookie with icing, and tie it to a present. It is a gift tag the recipient can eat.
13. Adding Edible Glitter
Edible glitter takes stained glass cookies from pretty to spectacular. After the cookies have cooled completely, brush the candy windows very lightly with a little corn syrup and sprinkle edible glitter over them. The glitter catches the light and makes the windows sparkle even more. Gold glitter on red glass and silver glitter on blue glass are the most beautiful combinations.
Use only edible glitter, which is made from food-safe ingredients and is sold in the baking aisle. Craft glitter is not food-safe and should never be used on cookies. A light hand is best — a little glitter goes a long way, and too much can make the cookies look messy instead of magical. Let the glitter set for a few minutes before handling the cookies.
14. Gluten-Free Stained Glass Cookies

A good gluten-free stained glass cookie is entirely possible, and the dough is actually forgiving because the candy window does most of the visual work. Use a one-to-one gluten-free flour blend that contains xanthan gum, and add an extra tablespoon of butter to keep the dough tender. The dough may feel a little crumblier than wheat dough, so handle it gently and chill it well before rolling.
Gluten-free cookies tend to spread less, which is actually an advantage for stained glass cookies — the windows stay open and the frames hold their shape beautifully. Roll the dough a little thicker than the regular version, about a third of an inch, so the frames are sturdy enough to hold the candy glass. Let the cookies cool completely on the baking sheet before moving them.
15. Vegan Swaps That Still Taste Like Christmas
A vegan stained glass cookie is easy to make with a few simple swaps. Replace the butter with a good vegan butter or refined coconut oil, and replace the egg with a flax egg — one tablespoon of ground flaxseed mixed with three tablespoons of water, left to thicken for five minutes. Check that your hard candies are vegan-friendly, since some contain gelatin or other animal-derived ingredients.
The dough may be slightly softer than the regular version, so chill it for at least ninety minutes before rolling and cutting. The cookies bake up just as crisp and buttery, and the candy windows melt exactly the same way. Most people will never guess they are vegan, which is exactly how a good swap should work.
16. Making Them Ahead and Storing
Stained glass cookies keep well if you store them right. Keep them in an airtight container at room temperature, in a single layer with parchment paper between the layers so the candy windows do not stick together. They stay fresh for about two weeks, which is longer than most cookies because the sugar cookie base is sturdy and the candy glass acts as a seal.
Humidity is the enemy of stained glass cookies — it makes the candy windows sticky and cloudy. Store them in a dry place, and avoid refrigerating them, because the cold and the moisture in the fridge will cloud the glass. If the windows do get a little sticky, a few minutes in a cool, dry room will usually fix them. For long-term storage, keep the cookies in a tin with a silica gel packet.
17. Gifting Them in Cookie Boxes
These cookies are made for gifting. Their colorful windows look stunning in a simple box lined with parchment paper, and they are the cookie everyone asks about. Pack them in a single layer if you can, with tissue paper between the layers to protect the glass. Add a few candy canes or a sprig of pine for decoration, and a handwritten tag with the cookie name.
For a cookie exchange, make a double batch and pack four cookies per box — fewer than other cookies, because these are special and a little more fragile. Include a note that the cookies can be hung on the tree as ornaments, which makes the gift even more delightful. It is the cookie that keeps on giving, first as a decoration and then as a dessert.
18. Decorating With Kids
Stained glass cookies are one of the best holiday cookies to make with children. Kids love choosing the candy colors, filling the windows, and watching the glass form in the oven. Let them pick their own shapes and colors, and do not worry if the cookies are not perfect — the handmade charm is the whole point. The cookies will be beautiful no matter what, because the candy glass does the hard work.
Keep the crushing step for adults, since the candy shards can be sharp. Children can help with rolling the dough, cutting the shapes, and filling the windows — all safe, fun jobs. Let them hang their own cookies on the tree when they are done, and take a photo of the moment. It is a holiday memory they will keep for years.
19. Pairing Them With Hot Cocoa
A stained glass cookie and a mug of hot cocoa are a perfect winter pairing. The crisp, buttery cookie is the ideal companion for a rich, warm drink, and the colorful windows look beautiful next to a steaming mug. Make a rich cocoa with real chocolate and a little cinnamon, and top it with whipped cream and a sprinkle of cocoa powder for a simple, cozy treat.
For a holiday dessert table, serve the cookies on a glass cake stand so the light shines through the windows. The cookies will look like little jewels on display, and guests will be drawn to them immediately. It is the kind of simple, beautiful presentation that makes a party feel special without any extra work.
20. Stained Glass Cookie Gift Tags
Stained glass cookies make wonderful gift tags. Make small cookies — about two inches across — with a hole for ribbon, and write the recipient’s name on the cookie with royal icing after it has cooled. Tie the cookie to a present with a ribbon, and the recipient gets a gift tag they can eat. It is a small, personal touch that makes any present feel more special.
For gift tags, use simple shapes like stars, circles, or hearts, and keep the windows small so the cookies are sturdy. Write the names with a fine-tipped piping bag and let the icing dry completely before tying the cookies to the gifts. Make a few extra, because someone will always want to eat theirs right away.
21. Decorating for a Cookie Platter
On a cookie platter, stained glass cookies are the showpiece. Their colorful windows stand out next to every other cookie, so place them where the eye will land first — in the center of the platter, or at the top of a tiered stand. The light shining through the windows makes the whole platter look brighter and more festive.
For a truly stunning platter, alternate stained glass cookies with white chocolate candy cane cookies and sprinkle embroidery cookies. The colorful glass, the red and white peppermint, and the intricate icing look like a holiday wonderland, and the mix of flavors — buttery, minty, and sweet — gives everyone something to love. It is the easiest way to make a simple cookie platter look like a professional one.
22. Troubleshooting Common Cookie Problems
If the candy did not melt fully, the oven was too cool or the candy pieces were too large. Crush the candy finer next time, and make sure the oven is fully preheated. If the candy bubbled over the edges, the windows were overfilled — use a level fill and brush away any stray pieces from the surface of the cookie.
If the cookies spread too much and the windows closed up, the dough was too warm or too soft. Chill the dough longer, roll it a little thicker, and make sure your butter is cool but pliable. And if the glass cracked when you moved the cookies, they were moved too soon — let them cool completely on the baking sheet, at least fifteen minutes, before touching them.
Frequently Asked Questions
What kind of candy should I use?
Bright, transparent hard candies in fruit flavors work best. Avoid opaque candies, chocolate, or anything with a filling — they will not melt into glass.
How long do stained glass cookies last?
About two weeks in an airtight container at room temperature, kept dry. Humidity makes the candy windows sticky, so store them in a dry place and avoid the fridge.
Can I hang them on the tree?
Yes. Poke a hole near the top edge with a straw before baking, and thread a ribbon through it after the cookies cool completely. They last for weeks on the tree in a dry room.
Why did my candy glass turn out cloudy?
The candy was probably stirred while melting, or the pieces were crushed too finely. Use a single color per window, do not stir, and aim for pieces about the size of coarse sand.
Can kids help make these?
Absolutely — they are one of the best kid-friendly holiday cookies. Adults should handle the candy crushing, but kids can roll, cut, fill the windows, and hang the finished cookies.
Can I make these ahead of time?
Yes. The cookies keep for about two weeks in an airtight container. You can also freeze the cut-out, unfilled dough for up to a month, then fill and bake when you are ready.
Conclusion

Stained glass Christmas cookies are the most magical cookie of the season: crisp, buttery, and filled with colorful candy glass that glows like a tiny window. They are fun to make, beautiful to look at, and delicious to eat — and they double as tree ornaments and gift tags. Crush the candy, cut the windows, and let the oven do the magic.
This season, make a batch for your family, a batch for your tree, and a batch for your friends. Pin this recipe for your next baking day, share it with someone who loves Christmas crafting, and enjoy the prettiest cookie of the holidays.


More holiday cookie inspiration from Bedinspo:
- White Chocolate Candy Cane Cookies — soft white chocolate candy cane cookies with peppermint crunch.
- Sprinkle Embroidery Christmas Cookies — beautifully decorated embroidery-style Christmas cookies.
- Italian Fig Cookies — traditional Italian fig cookies for the holidays.
- Monkey Bread Recipe — gooey pull-apart monkey bread for holiday mornings.