Sprinkle Embroidery Christmas Cookies
Sprinkle Embroidery Christmas Cookies
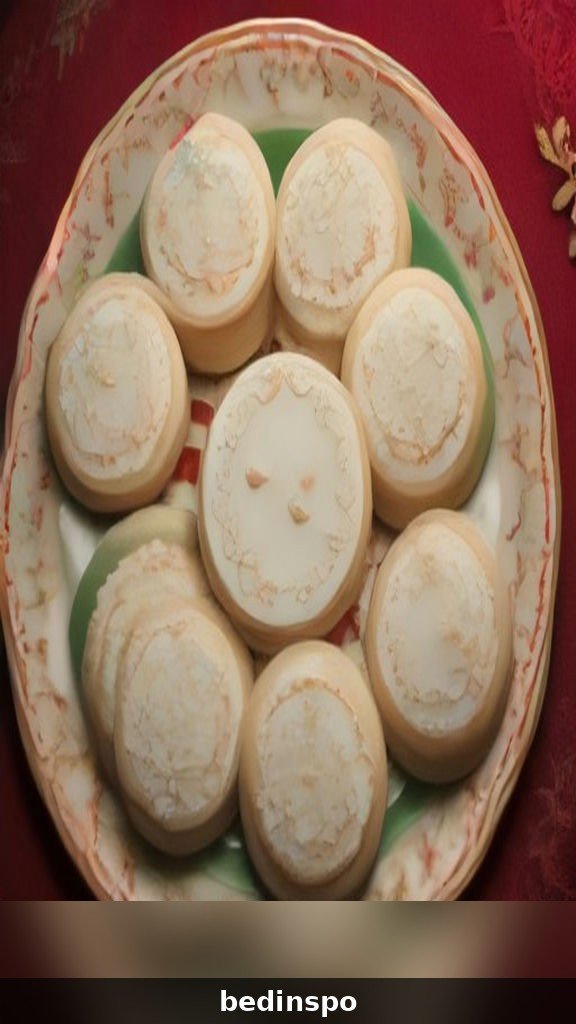
There is a cookie trend that looks like it came straight out of a sewing basket, and it is one of the prettiest things to happen to holiday baking in years. Sprinkle embroidery Christmas cookies are buttery sugar cookies decorated with royal icing piped to look like embroidered flowers, leaves, and stitches — tiny French knots, lazy daisies, and delicate stems, all in soft holiday colors, with a sprinkle or two tucked in like a bead. They look like little pieces of stitched linen, and they taste like the best sugar cookie you have ever had.
Do not let the delicate look intimidate you. Embroidery piping is one of the easiest decorating techniques there is, because it is made of simple dots, lines, and tiny loops — no flooding, no perfect edges, no steady hand required. This guide covers the sugar cookie base, the royal icing, and twenty-two ideas for designs, colors, and occasions, so you can make a batch of cookies that look like they took hours and actually took one relaxed afternoon.
1. What Is Embroidery Cookie Decorating?

Embroidery cookie decorating borrows its look from hand stitching. Instead of flooding a cookie with a smooth sheet of icing, you pipe small details that imitate stitches: a French knot is a dot of icing, a lazy daisy is a loop of five petals around a center dot, a stem stitch is a line of tiny overlapping dashes, and a cross stitch is two short lines crossed over each other. Together, these simple marks look like a piece of embroidered fabric.
The beauty of the technique is that it is forgiving. Real embroidery is made of imperfect little stitches, so your icing does not need to be perfect either. A slightly wobbly stem looks handmade, a dot that is a little too big looks like a knot, and a petal that is a little uneven looks like a real flower. It is the rare decorating style where charm matters more than precision, and beginners often make the prettiest cookies.
2. The Buttery Sugar Cookie Base
An embroidery cookie needs a sugar cookie that holds its shape perfectly in the oven, because the decoration is the star and the canvas has to be clean. This dough uses butter, sugar, an egg, vanilla, almond extract, flour, baking powder, and salt — and no leavener beyond a small amount of baking powder, so the cookies bake up flat and smooth with crisp, clean edges that do not spread.
Chill the dough for at least an hour before rolling, and roll it to an even quarter inch thick. Use a ruler or rolling pin guides if you have them, because even thickness means even baking. Cut the cookies with simple shapes — circles, squares, and rectangles show off embroidery best — and chill the cut cookies on the baking sheet for ten minutes before they go in the oven. Cold dough holds its edges, and sharp edges make the embroidery look like it is stitched on real fabric.
3. Royal Icing: The Thread

Royal icing is the thread of embroidery cookies, and it needs to be the right consistency. For piping stitches, you want a medium-stiff icing — thick enough to hold a dot or a loop without spreading, but soft enough to flow smoothly from the tip. It should ribbon off the spoon and hold a soft peak, like a thick yogurt. If it is too stiff, it will be hard to pipe and the dots will have points; if it is too thin, the stitches will melt into puddles.
Make royal icing with meringue powder, powdered sugar, and water, and always sift the powdered sugar first so the icing is perfectly smooth. Color small portions with gel food coloring — a little goes a long way — and keep each color in a piping bag fitted with a small round tip, or in a squeeze bottle. Cover the icing with a damp cloth whenever you are not using it, because royal icing crusts over in minutes when exposed to air.
4. Choosing Your Holiday Color Palette
The colors you choose will define the whole look of your embroidery cookies. A classic Christmas palette — deep red, forest green, and gold on a white or cream base — is timeless and elegant. A softer palette of dusty pink, sage green, and cream feels romantic and vintage, like an old sampler. A winter white palette, with pale blue and silver stitches on a white cookie, looks like frost on a window.
Pick three or four colors at most, plus a neutral base, so the cookies look intentional rather than busy. Mix gel food coloring into white royal icing a drop at a time until you reach the shade you want, and remember that icing darkens slightly as it dries. Make all your colors at the start of the session so you are not stopping to mix in the middle of piping, and keep a test cookie nearby to try each color before you commit to a design.
5. The French Knot: Your First Stitch

The French knot is the easiest embroidery stitch to pipe, and it is the foundation of almost every design. Hold the piping bag straight down over the cookie, squeeze a small dot of icing, and lift straight up. That is it. A tiny dot is a knot, and a cluster of knots in different colors looks like a bouquet of tiny flowers or a sprinkle of berries on a branch.
Vary the size of your knots by squeezing more or less icing, and vary the spacing to create different effects. A tight cluster of small knots makes a flower center, a scattered line of knots makes a vine, and a ring of knots makes a wreath. French knots are also the most forgiving stitch — if a dot is imperfect, it still looks like a knot, because real French knots are never perfectly round either.
6. Lazy Daisies and Simple Flowers
The lazy daisy is the classic embroidered flower, and it is made of five simple loops. Pipe a small loop by squeezing icing and pulling the tip outward, then back to the center, to make a petal. Repeat five times around a center dot, and you have a daisy. Change the petal color, the center color, or the number of petals, and you have a completely different flower.
Try a row of lazy daisies along the edge of a square cookie for a border, or a single large daisy in the center of a round cookie for a focal point. Add a tiny French knot in a contrasting color in the center of each flower, and a stem stitch curving away from it, and the cookie suddenly looks like a piece of stitched linen. Lazy daisies are simple, but they are the stitch that makes people say wow.
7. Stems, Leaves and Vines

Stems and leaves give embroidery cookies their garden feel. A stem is a line of tiny overlapping dashes, piped by squeezing and releasing the bag in a steady rhythm as you move across the cookie. A leaf is a teardrop shape, piped by squeezing a dot and pulling the tip away to a point. Two leaves on either side of a stem make a sprig, and a curving vine with leaves and knots makes a border.
Practice stems on parchment paper before you pipe on a cookie, because a steady rhythm takes a few tries to find. Once you have it, stems are fast — a whole vine takes less than a minute. Leaves are even faster. Together, stems and leaves turn a few flowers into a garden, and they fill the empty space on a cookie without making it look crowded.
8. The Base Coat: To Flood or Not to Flood
Embroidery cookies can be piped directly onto a bare cookie, which gives them a rustic, linen-like look, or onto a thin base coat of flooded royal icing, which gives them a smooth, polished finish. Both are beautiful, and the choice depends on the look you want. A bare cookie shows the golden color of the sugar cookie around the stitches, which feels homemade and warm. A flooded base makes the colors pop and the cookies look more finished.
If you flood, use a thinner icing and a slightly larger tip, outline the cookie first, then fill in the middle and smooth it with a toothpick. Let the base dry completely — at least six hours, or overnight — before piping the embroidery on top, or the stitches will sink into the wet icing. If you skip the flood, you can start piping as soon as the cookies are cool, which makes embroidery cookies one of the fastest decorated cookies you can make.
9. Sprinkles as Beads and Berries

Sprinkles are the secret ingredient that gives these cookies their name. A tiny nonpareil placed in the center of a lazy daisy looks like a bead. A row of red sprinkles along a green stem looks like holly berries. A sprinkle pressed into a wet French knot adds sparkle and texture, and a scattering of gold sprinkles over the whole design looks like frost.
Use tweezers to place sprinkles precisely, and press them gently into the wet icing so they stick. Work one flower at a time, because royal icing starts to crust within minutes and a sprinkle will not stick to a dry surface. Keep the sprinkles small — nonpareils and tiny pearls work best — because large sprinkles can overwhelm the delicate stitching. A few sprinkles go a long way.
10. Cookie Cutter Shapes That Show Off Stitching
The shape of the cookie is the frame for the embroidery, and simple shapes work best. Circles are the classic choice — a round cookie is like a hoop of embroidery fabric, and a wreath or a flower in the center looks perfect. Squares and rectangles look like sampler squares, and they are ideal for border designs and repeating patterns. Ovals are elegant and unusual, and they suit a single stem of flowers.
Save the complicated shapes — trees, stars, reindeer — for flooded cookies, and let embroidery shine on simple shapes. A set of round and square cookies, decorated with the same stitches in different arrangements, looks like a coordinated collection and photographs beautifully. Simple shapes also bake more evenly, which means a smoother canvas for your stitching.
11. Drying and Storing Decorated Cookies

Royal icing needs time to dry completely, and rushing it is the most common mistake in cookie decorating. Embroidery stitches are small, so they dry faster than a flooded cookie — usually four to six hours at room temperature is enough — but let them dry overnight if you can. Do not stack the cookies until the icing is completely hard to the touch, or the stitches will smudge.
Store decorated cookies in a single layer in an airtight container at room temperature, with wax paper between layers once they are fully dry. They keep for up to two weeks, and the icing actually protects the cookie underneath, keeping it fresh longer than an undecorated cookie. Do not refrigerate decorated cookies, because condensation can make the icing weep and the colors bleed.
12. Embroidery Cookies as Holiday Gifts
Embroidery cookies make extraordinary gifts because they look like they took hours of work — and they did take care, but not nearly as long as people think. Pack four or six cookies in a clear box or a tin lined with tissue paper, tie it with a ribbon, and include a small card. The recipient will think you are a professional decorator, and you will know the truth: it was dots and loops and a relaxed afternoon.
For a larger gift, pair a box of embroidery cookies with a small embroidery hoop and a skein of thread, for a friend who sews. Or include a handwritten recipe card so they can make their own. Embroidery cookies are the kind of gift that gets photographed before it gets eaten, and that is the highest compliment a holiday cookie can receive.
13. A Beginner’s First Embroidery Cookie

If you have never decorated a cookie before, embroidery is the perfect place to start. You do not need to flood, you do not need to outline, and you do not need a steady hand. All you need is a batch of round sugar cookies, one bag of white royal icing, and one bag of red. Pipe a ring of red French knots around the edge, a green stem stitch curving across the middle, and a single lazy daisy in the center. That is a beautiful cookie.
Start with one design and repeat it on every cookie in the batch. Repetition is how you get good — by the tenth cookie, your knots will be even and your daisies will be confident. Do not compare your first cookie to a professional’s hundredth cookie. Compare it to your tenth, and you will see how fast embroidery decorating improves.
14. Wreath Designs for Christmas
A wreath is the most festive embroidery design, and it is easier than it looks. Pipe a ring of green French knots around the edge of a round cookie, then add small red knots scattered through the green as berries, and a tiny bow piped in red at the bottom. The result is a Christmas wreath that looks like it was stitched on linen, and it takes about two minutes per cookie.
Try variations: a wreath of lazy daisies in white and gold, a wreath of leaves with red berries, or a simple green vine ring with a single red bow. A set of wreath cookies in different color combinations looks stunning on a holiday platter, and each one is unique. Wreaths are also the most popular embroidery design on Pinterest, so they are a wonderful choice if you are baking for a crowd.
15. Monograms and Initial Cookies

An embroidered initial is a beautiful personal touch for a holiday gift or a place setting. Pipe a large letter in the center of a square cookie using a stem stitch, then surround it with small flowers and leaves. The letter looks like it was monogrammed on a handkerchief, and it turns an ordinary cookie into a keepsake.
Monogram cookies are perfect for place cards at a holiday dinner — one cookie at each setting, with the guest’s initial stitched on it, is a favor and a decoration in one. They also make lovely gifts for teachers, with the teacher’s initial on the cookie. Practice the letter on parchment first, because a confident, flowing letter looks far better than a hesitant one.
16. Vintage Sampler Style
A vintage sampler style uses muted colors — dusty rose, sage green, cream, and soft gold — and simple repeating patterns to create cookies that look like they came from a grandmother’s sewing basket. Pipe a border of cross stitches around the edge of a square cookie, a small flower in each corner, and a single word or initial in the center. The effect is nostalgic and charming.
Sampler cookies look best as a set, with each cookie showing a different small motif: a flower, a heart, a bird, a star. Together they tell a story, and they are wonderful for a holiday table that leans vintage or rustic. Use matte colors rather than bright ones, and keep the designs simple — the charm of a sampler is in its restraint.
17. Troubleshooting Royal Icing
If your icing is too stiff, it will be hard to squeeze from the bag and the dots will have sharp points. Add water a half teaspoon at a time and stir well, until the icing flows smoothly and the points soften. If the icing is too thin, the stitches will spread and lose their shape — add sifted powdered sugar a tablespoon at a time until it holds a dot.
If your icing crusts in the bag, the tip is clogged with dried icing. Keep a damp cloth over the tip when you pause, and rinse the tip in warm water if it clogs. If your colors bleed into each other, the base coat was not fully dry before you piped on top of it. Patience is the fix for almost every royal icing problem — let layers dry completely before adding the next one.
18. Making Embroidery Cookies with Kids
Embroidery cookies are wonderful for children, because the stitches are simple and the results are forgiving. Give each child a cookie and a bag of icing, and let them pipe dots and loops however they like. There is no wrong way to make a French knot, and a cookie covered in colorful dots is a beautiful cookie no matter who made it.
Set up a decorating station with small bowls of colored icing, a pile of sprinkles, and a stack of plain cookies, and let children design their own. The mess is part of the fun, and the cookies they decorate themselves will be the ones they are proudest of. Keep a damp cloth nearby for sticky hands, and remember that the goal is joy, not perfection.
19. Embroidery Cookies for a Cookie Exchange
Embroidery cookies are a standout at a cookie exchange, because they look completely different from every other cookie on the table. While everyone else brings rounds and bars, a box of cookies that look like stitched linen will draw a crowd. Pack them carefully in a single layer, because the icing is delicate, and include a card explaining the technique — other bakers will be fascinated.
Make a double batch if you are bringing embroidery cookies to an exchange, because you will want a set for home too. The decorating takes longer than a plain cookie, so start the day before and let the icing dry overnight. The extra time is worth it: these are the cookies people photograph, ask about, and remember long after the exchange is over.
20. Beyond Christmas: Year-Round Embroidery Cookies
Embroidery decorating is not just for Christmas. The same stitches make beautiful cookies for every season — pastel flowers for spring, bright berries for summer, autumn leaves for fall, and snowflakes for winter. A set of embroidery cookies in soft pastels is perfect for a baby shower, and a set in wedding colors makes a lovely favor.
Once you learn the basic stitches, you can use them all year. Change the colors and the motifs, and the same technique gives you a completely different cookie. Embroidery cookies are a skill that keeps giving, long after the Christmas decorations come down.
21. Photographing Your Embroidery Cookies
Embroidery cookies are made to be photographed, and a few simple tips will make your photos shine. Photograph them in natural light, near a window, on a plain background — a linen napkin, a wooden board, or a white plate. The stitches are small, so get close, and take the photo from directly above so the design is flat and clear.
Arrange the cookies in a group with a little space between them, and include a prop or two — a spool of thread, a sprig of greenery, a piping bag. The props tell the story of how the cookies were made, and they make the photo feel warm and handmade. Good photos are how these cookies became a trend, and your batch deserves to be shared.
22. The Cookie That Looks Like Art
Every holiday season has a cookie that people talk about, and this year it might be yours. Sprinkle embroidery Christmas cookies look like art, but they are made of dots and loops and a little patience. They are the rare holiday cookie that is as fun to make as it is to eat, and as beautiful to look at as it is delicious.
Make a batch this weekend, put on some holiday music, and pipe a garden of flowers onto your cookies. When you set them out on a plate and someone asks how you did it, you can smile and say it is just embroidery — with icing instead of thread. That is the magic of these cookies: they turn a simple sugar cookie into a little work of art.
Frequently Asked Questions
Do I need special piping tips for embroidery cookies?
A small round tip, size 1 or 2, is all you need for most stitches. You can also snip a tiny hole in the corner of a piping bag. No special equipment is required beyond a basic round tip.
How long does royal icing take to dry?
Small embroidery stitches dry in four to six hours at room temperature, but let decorated cookies dry overnight if you can. Do not stack them until the icing is completely hard to the touch.
Can I pipe embroidery on a bare cookie without flooding?
Yes, and it looks wonderful. Piping directly on the cookie gives a rustic, linen-like finish, and you can start decorating as soon as the cookies are cool. Flooding first gives a smoother, more polished look.
What if my royal icing is too stiff or too thin?
Add water a half teaspoon at a time to thin it, or sifted powdered sugar a tablespoon at a time to thicken it. The right consistency holds a dot without spreading and flows smoothly from the tip.
How long do decorated cookies keep?
Up to two weeks in an airtight container at room temperature, stored in a single layer with wax paper between layers once fully dry. Do not refrigerate them.
Can kids decorate embroidery cookies?
Absolutely — it is one of the best decorating techniques for children. The stitches are simple dots and loops, there is no wrong way to make a French knot, and the results are always charming.
Conclusion

Sprinkle embroidery Christmas cookies are proof that the prettiest holiday cookies are not always the hardest to make. A buttery sugar cookie, a bag of royal icing, and a few simple stitches — a dot, a loop, a line — turn into a cookie that looks like it was stitched by hand. It is delicate, festive, and completely delicious.
This holiday season, try your hand at embroidery cookies. Start with French knots, add a lazy daisy or two, and see where the stitches take you. Pin this guide for your next decorating day, share it with a friend who loves to bake, and enjoy the cookie that looks like art.


More decorated holiday cookies from Bedinspo:
- Linzer Cookies Recipe — jam-filled linzer cookies with a snowy sugar dusting.
- Hot Chocolate Drop Cookies — rich hot chocolate drop cookies for cocoa lovers.
- Pistachio Cranberry Shortbread Cookies — buttery shortbread with pistachios and cranberries.
- Gateau Napolitain Cookies — layered Napolitain cookies for a festive table.