Easy DIY Christmas Decorations: 20 Budget Ideas
Christmas decorating does not have to mean a cart full of expensive store-bought pieces. Some of the prettiest, most pin-worthy holiday homes are decorated with paper, pinecones, string lights, and a few dollar-store finds — made in an afternoon, for just a few dollars each. These easy DIY Christmas decorations prove that a little creativity goes much further than a big budget, and every project here is genuinely beginner-friendly. If you can fold paper, tie a bow, or use a glue gun, you can make these.
This guide gathers twenty budget-friendly Christmas decoration projects, from paper snowflakes and dried orange garlands to glowing mason jar luminaries and a show-stopping table centerpiece. Each idea includes a materials list, clear step-by-step instructions, an honest cost estimate, and tips for making the finished piece look polished rather than crafty. Mix and match them across your rooms, make them with your family, and enjoy a home that feels handmade in the very best way.
1. Paper Snowflake Window Display
Paper snowflakes are the original budget Christmas decoration, and done well they look like delicate lace against a winter window. All you need is white copy paper, sharp scissors, and some clear tape or removable adhesive dots. Fold a square of paper into quarters, then fold it once more into a triangle, and cut small triangles, curves, and notches along the folded edges. Unfold it slowly and you have a one-of-a-kind snowflake — no two ever come out the same.
For a window display that looks intentional rather than random, make snowflakes in three sizes and cluster them in one corner of the window, denser at the edges and sparser toward the center. Add a few flakes dusted with white glitter spray for sparkle, and hang one or two from the curtain rod on clear thread so they float. A pack of copy paper costs about a dollar, and one afternoon of folding fills every window in the house.
- Materials: white copy paper, scissors, clear tape or adhesive dots, optional glitter spray
- Cost: about $1 to $3 for a whole houseful
- Time: 30 to 45 minutes
2. Mason Jar Luminaries
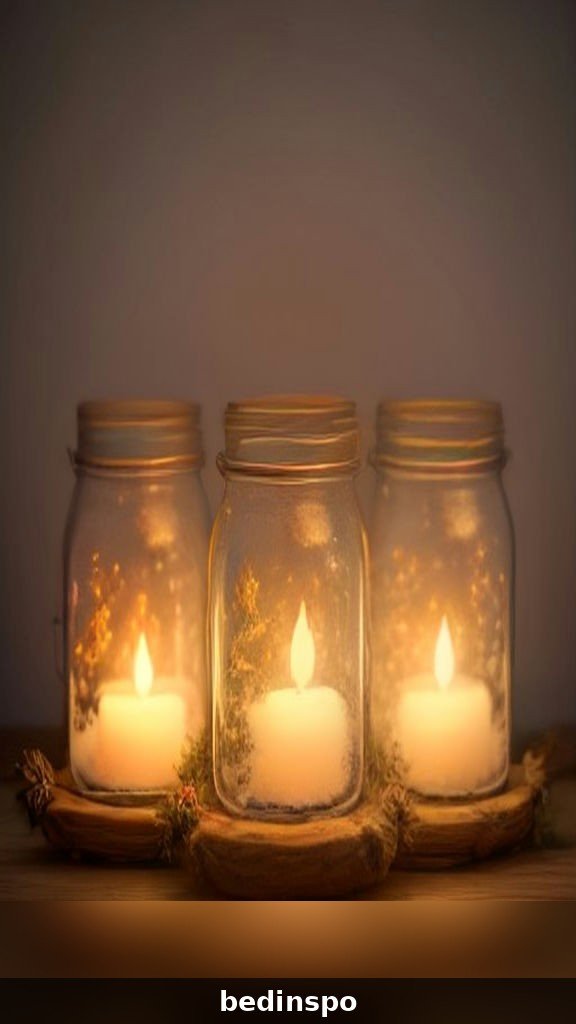
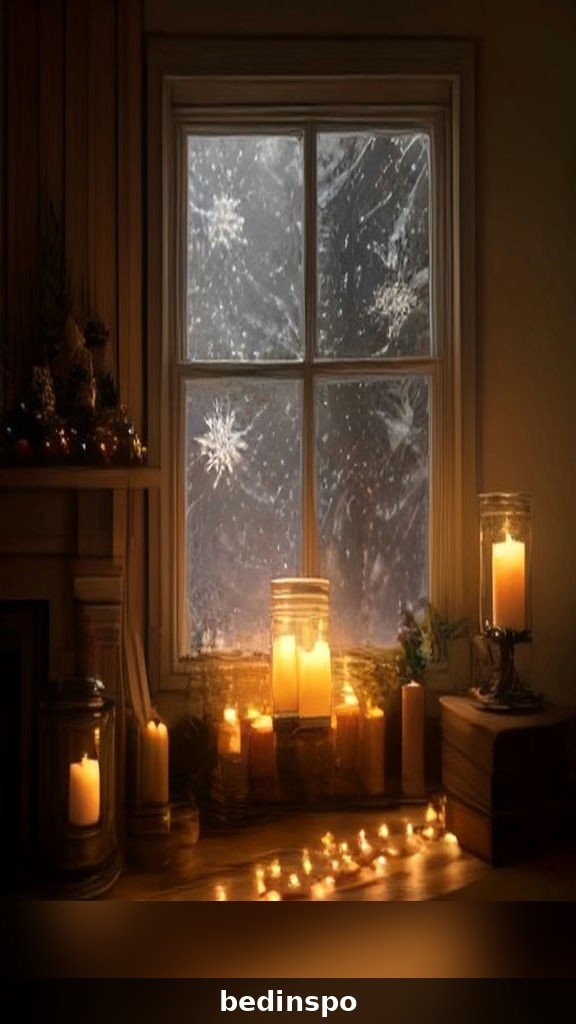
Mason jar luminaries turn a pantry staple into the warmest glow in the house. Start with clean mason jars in any size, and coat the inside with a thin layer of white glue mixed with a little water, then roll Epsom salt around the inside so it sticks in a frosty layer. Drop in a battery-operated tea light, and the salt scatters the light into a soft, snowy shimmer that looks magical on a mantel, a windowsill, or a dinner table.
You can dress these up in a dozen ways without spending more. Tie a strip of plaid ribbon or twine around the rim, add a sprig of faux pine or a cinnamon stick, or stencil a simple star or tree on the outside with white paint. Group three jars of different heights together for a centerpiece, and use a timer tea light so they switch on at dusk by themselves. The jars are reusable year after year — just wipe them out and store them flat.
- Materials: mason jars, white glue, Epsom salt, battery tea lights, ribbon or twine
- Cost: about $2 to $5 per jar
- Time: 20 minutes plus drying time
3. Dried Orange Slice Garland
Few decorations smell as good as they look, but a dried orange garland does both. Slice oranges about a quarter-inch thick, pat them dry, and bake them on a low oven — around 200 degrees — for two to three hours, flipping them halfway through, until they are dry and slightly translucent. Then thread them onto twine with a large needle, alternating slices with cinnamon sticks, star anise, and small sprigs of pine for a garland that looks like it came from a farmhouse shop.
Hang the garland across a mantel, along a staircase banister, or in a sunny window where the light shines through the amber slices. It lasts for years if you store it flat in a box with tissue paper, and it costs almost nothing if oranges are already in your kitchen. For a fuller look, add dried apple slices or cranberries strung on the same twine, and tie the ends with a simple bow so the garland drapes in a gentle curve.
- Materials: oranges, twine, large needle, cinnamon sticks, star anise, optional pine sprigs
- Cost: about $3 to $6
- Time: 3 hours mostly hands-off baking, 15 minutes to string

4. Pinecone Ornaments
Pinecones are free, beautiful, and endlessly versatile, and turning them into ornaments takes only minutes. Collect pinecones from your yard or a park, bake them at 200 degrees for about an hour to open the scales and remove any critters, then let them cool. Paint just the tips of the scales with white craft paint for a snowy effect, add a dab of glue and a sprinkle of glitter, and tie a loop of ribbon or twine around the top for hanging.
These ornaments look wonderful on the tree, but do not stop there. Fill a glass bowl or a wooden tray with a dozen painted pinecones for an instant centerpiece, tuck them into a wreath, or hang three at different lengths from a branch for a rustic wall hanging. You can also dip the bottoms in gold or copper paint for a more glamorous look, or leave them natural for a woodland style. Because they cost nothing but paint and ribbon, they are the perfect project to make in bulk for gifts.
- Materials: pinecones, white or metallic craft paint, paintbrush, glitter, ribbon or twine
- Cost: about $1 to $3 per dozen
- Time: 30 minutes plus baking
5. Dollar-Store Candle Centerpiece
The dollar store is a goldmine for Christmas decorating, and this centerpiece proves it. Start with a long, low tray or a rectangular mirror from the dollar store, and arrange three pillar candles of different heights down the center. Surround them with faux pine sprigs, a few red ornaments, pinecones, and a sprinkle of fake snow, and you have a centerpiece that looks like it cost fifty dollars for about ten.
The secret to making dollar-store pieces look expensive is grouping and layering. Use odd numbers — three candles, five ornaments — and vary the heights so the eye moves across the arrangement. Tuck the greenery in first to hide the tray edges, then add the candles, then the ornaments, and finish with a dusting of snow and a few battery fairy lights woven through the greenery. Swap the red ornaments for gold or silver to match any color scheme, and the whole thing comes apart in January for easy storage.
- Materials: tray or mirror, 3 pillar or flameless candles, faux pine sprigs, ornaments, pinecones, fake snow
- Cost: about $8 to $12
- Time: 20 minutes

6. Paper Bag Luminaries
Paper bag luminaries are one of the oldest and simplest Christmas decorations, and they still stop people in their tracks on a dark December evening. Take plain white or brown paper lunch bags, fold the tops down about two inches, and punch a few small star or dot patterns into the sides with a hole punch. Set a battery tea light inside each bag on a fireproof surface, and line them along a walkway, porch steps, or windowsill for a row of glowing stars.
For the safest and prettiest result, always use battery tea lights, never real candles, and place the bags on a flat, stable surface away from curtains and dry leaves. You can decorate the bags first with stamps, stencils, or a simple hand-drawn tree, and add a scoop of sand or small pebbles at the bottom for weight on windy porches. A pack of fifty bags costs a couple of dollars, so this is the project to scale up: a whole driveway lined with luminaries on Christmas Eve is unforgettable.
- Materials: paper lunch bags, hole punch, battery tea lights, sand or pebbles
- Cost: about $3 to $5 for a dozen
- Time: 15 minutes
7. Cinnamon Stick Candle Holders
Cinnamon stick candle holders fill a room with holiday scent before you even light the candle. Take a plain pillar candle and stand cinnamon sticks vertically around it, securing them with a rubber band hidden under a ribbon or twine bow. The sticks should be roughly the same height as the candle, or a little taller, and packed tightly enough that no gaps show. The result looks like a rustic bundle straight from a Christmas market.
Use a flameless candle if the holder will sit near children or pets, or if you plan to leave it unattended — real candles work too, but keep the flame well below the top of the sticks and never leave them burning alone. Pair the holder with a small wooden tray, a few pine sprigs, and a scattering of star anise for a complete vignette. Cinnamon sticks are inexpensive in bulk bags, so make three holders in different heights and group them on the mantel for a fragrant, layered display.
- Materials: pillar or flameless candles, cinnamon sticks, rubber bands, ribbon or twine
- Cost: about $3 to $6 each
- Time: 10 minutes

8. Felt Christmas Tree Garland
A felt garland is soft, colorful, and completely unbreakable, which makes it perfect for homes with small children or curious pets. Cut simple tree shapes from green felt in two or three shades, then cut small circles from red, gold, and white felt for ornaments. Stitch or glue the circles onto the trees, punch a hole at the top of each one, and thread them onto twine with a wooden bead or a small pom-pom between each tree.
The charm of this garland is its handmade imperfection — slightly wonky trees look more endearing than perfect ones. If you do not sew, a hot glue gun works just as well, and no-sew felt kits are available at most craft stores for a few dollars. Hang the garland across a mantel, a doorway, or a child’s bedroom wall, and it folds flat into a drawer after Christmas, ready to come out again next year without a single broken piece.
- Materials: green, red, gold and white felt, scissors, glue gun or needle and thread, twine, wooden beads
- Cost: about $4 to $7
- Time: 45 minutes to 1 hour
9. Salt Dough Ornaments
Salt dough ornaments are the classic family Christmas craft for a reason: the dough costs pennies, the shapes are endless, and the finished ornaments last for years. Mix two cups of flour, one cup of salt, and one cup of water into a firm dough, roll it out to about a quarter-inch thick, and cut shapes with cookie cutters — stars, trees, gingerbread people, snowmen. Poke a hole near the top of each shape with a straw before baking at a low oven for two to three hours until fully dry and hard.
Once cool, paint the ornaments with acrylic paint, add glitter or a coat of clear sealer, and thread ribbon through the holes. Let children press a handprint or a fingerprint into a round ornament for a keepsake you will treasure every December. Store finished ornaments in tissue paper in a dry box — moisture is their only enemy — and they will hang on your tree for a decade or more, carrying a little family history with them.
- Materials: flour, salt, water, cookie cutters, straw, acrylic paint, ribbon, clear sealer
- Cost: about $2 to $4 per batch
- Time: 1 hour of making plus baking

10. Pinecone Christmas Tree Tabletop Display
A single large pinecone, painted green and decorated with tiny beads, becomes the cutest miniature Christmas tree on a shelf or side table. Paint a large, open pinecone with green craft paint, getting into the scales with a small brush, then glue tiny pom-poms, beads, or sequins onto the scale tips as ornaments. Add a small star cut from gold cardstock on top, and set the tree on a small wooden slice or a jar lid wrapped in burlap as its base.
Make a little forest of them in different sizes — three pinecone trees grouped on a tray with fake snow and a few battery tea lights make a complete tabletop scene. This is a wonderful project for kids, since there is no right way to decorate a pinecone tree, and every one looks charming. Spray the finished trees lightly with white paint or glitter for a snowy finish, and they will keep for years on a shelf.
- Materials: large pinecones, green craft paint, pom-poms or beads, gold cardstock, wooden slices
- Cost: about $2 to $5 for a set of three
- Time: 30 to 45 minutes
11. Twine-Wrapped Bottle Vases
Empty glass bottles and jars become rustic Christmas vases with nothing more than twine and a glue gun. Start at the bottom of a clean bottle, dot on hot glue, and wrap jute twine tightly around the glass, working your way up and pressing each row snug against the last. Stop three-quarters of the way up for a two-tone look, or wrap the whole bottle. Tie a small bow at the neck and fill it with a few stems of faux pine, red berries, or dried eucalyptus.
A set of three bottles in different heights and sizes makes a beautiful mantel or table arrangement, and the project costs almost nothing if you save bottles from the recycling bin. For a snowy variation, wrap the bottles in white cotton twine instead of jute, or add a stripe of red ribbon around the middle. These vases work far beyond Christmas too — swap the pine for fresh flowers in January and they stay on the shelf all year.
- Materials: clean glass bottles or jars, jute twine, hot glue gun, ribbon, faux pine or berry stems
- Cost: about $1 to $3 each
- Time: 20 minutes per bottle

12. Paper Chain Countdown Garland
A paper chain garland is pure nostalgia, and it doubles as a Christmas countdown the whole family will love. Cut strips of red, green, white, and gold construction paper, and loop them into a chain, gluing or stapling each link closed. Make twenty-five links — one for each day of December — and remove one each morning as Christmas approaches, or write a small holiday activity on each link, like baking cookies or watching a Christmas movie, and open it as a family.
Drape the chain across a mantel, along a staircase, or around a doorway, and let it sag in gentle swags rather than pulling it taut. Construction paper is inexpensive, and a single pack makes a very long chain, so this is a great project for a rainy afternoon with kids. For a more polished look, use patterned scrapbook paper in a matching palette, or alternate solid colors with a metallic gold link every fifth loop for a little sparkle.
- Materials: construction or scrapbook paper, scissors, glue stick or stapler, marker
- Cost: about $2 to $4
- Time: 45 minutes
13. Evergreen Table Runner
An evergreen table runner brings the forest indoors and costs a fraction of a store-bought runner. Lay a strip of burlap or linen down the center of your table, then layer fresh or faux pine, cedar, and eucalyptus branches along it, overlapping the stems so no fabric shows through. Tuck in pinecones, red berries, and dried orange slices, and weave a string of battery fairy lights through the greenery for an evening glow.
Fresh greenery lasts about a week indoors, so build this runner the day before a holiday dinner, and mist it lightly to keep it fresh. Faux greenery lasts all season and can be stored flat in a box. Either way, the runner anchors the whole table — add candles, place settings, and a few scattered ornaments, and dinner feels like a celebration. Keep the runner narrow enough that plates still fit comfortably on either side.
- Materials: burlap or linen runner, pine and cedar branches, pinecones, berries, battery fairy lights
- Cost: about $5 to $10 with faux greenery, less with clippings from the yard
- Time: 30 minutes

14. DIY Advent Calendar
An advent calendar you make yourself is more fun than any store-bought version, because you choose every surprise inside. The simplest version uses twenty-five small paper bags or envelopes, numbered one through twenty-five, clipped to a length of twine with wooden clothespins and hung on the wall. Fill each bag with a small treat, a note, or a tiny activity, and let the countdown become the best part of December.
For a sturdier version, glue small boxes or toilet paper tubes onto a board in the shape of a tree, paint the board green, and number each compartment. Kids can help decorate the bags with stamps, stickers, and washi tape, and the calendar becomes a decoration in its own right. Refill it every year with new treats, and it becomes a family tradition that costs almost nothing after the first December.
- Materials: small paper bags or envelopes, twine, clothespins, number stickers, treats
- Cost: about $5 to $8 plus treats
- Time: 1 hour
15. Glowing Christmas Village on a Shelf
A Christmas village sounds expensive, but a simple version made from cardboard and paper is nearly free. Cut simple house shapes from cardboard or thick cardstock, paint them white, cream, or pale gray, and cut out tiny windows and doors. Set a battery tea light behind each house, and the windows glow warmly. Arrange the houses on a shelf with a layer of cotton batting or fake snow as the ground, and add bottle-brush trees and a few pinecones for a complete village scene.
The houses do not need to be perfect — slightly crooked roofs and uneven windows only add charm. Make five or six houses in different sizes, and vary the rooflines: a tall church with a steeple, a low cottage, a shop with an awning. Children love helping paint the houses, and the finished village looks wonderful on a mantel, a windowsill, or a sideboard. Store the houses flat in a box and the village returns every year.
- Materials: cardboard or cardstock, craft paint, scissors or craft knife, battery tea lights, cotton batting, bottle-brush trees
- Cost: about $3 to $6
- Time: 1 to 2 hours

16. Ribbon and Bow Tree Topper and Accents
A big, beautiful bow is the fastest way to make a tree — or a wreath, a garland, or a gift — look professionally decorated. Use wide wired ribbon, at least two and a half inches, in a color that matches your theme: deep red velvet, gold, plaid, or champagne. Loop the ribbon back and forth in six-inch loops, pinch the center, wrap it tightly with floral wire, then fluff each loop and curl the tails with scissors. Wire the finished bow to the top of the tree or the center of a garland.
Do not stop at one bow. Make smaller matching bows and tuck them throughout the tree, tie one onto each chair back at the dinner table, and add one to the front door wreath. Wired ribbon holds its shape far better than unwired, and one roll makes several bows, so the cost per bow is only a dollar or two. Practice on a scrap piece first — the first bow is always the hardest, and by the third you will be making them like a florist.
- Materials: wide wired ribbon, floral wire, scissors
- Cost: about $3 to $6 per roll
- Time: 15 minutes per bow
17. Stovetop Simmer Pot as Decor
A stovetop simmer pot is decoration you can smell from the front door, and it doubles as a beautiful kitchen display. Fill a small saucepan or a glass jar with water, orange slices, cinnamon sticks, whole cloves, star anise, and a few cranberries, and set it on the stove. When guests arrive, bring it to a gentle simmer and your whole home smells like Christmas in minutes. Between simmers, the jar itself — with its jewel-toned layers — looks lovely sitting on the counter or the stove.
Make a dry version as a gift: layer the same ingredients in a clear cellophane bag or a mason jar, tie it with twine, and attach a tag with simmering instructions. It costs about two dollars per jar and makes a thoughtful hostess gift. Keep a pot simmering on low during holiday gatherings, topping up the water every hour or so, and refresh the ingredients every couple of days for the best scent.
- Materials: oranges, cinnamon sticks, cloves, star anise, cranberries, saucepan or jar
- Cost: about $2 to $4 per pot
- Time: 10 minutes

18. DIY Christmas Gift Tags and Place Cards
Small details make a holiday table feel special, and handmade gift tags and place cards are the easiest detail of all. Cut tags from kraft cardstock or recycled Christmas cards, punch a hole in one end, and decorate them with stamps, a sprig of pine, a dried orange slice, or a simple hand-lettered name. Thread twine through the hole and tie each tag to a gift, a stocking, or a napkin at the dinner table.
Place cards work the same way: fold small cards into tents, write each guest’s name in your best handwriting or with a gold pen, and lean one against each plate. Add a tiny pine sprig or a cinnamon stick tied to the card for a finishing touch. A pack of cardstock costs a few dollars and makes dozens of tags, so this is the project that makes every gift and every place setting look like you planned it for weeks.
- Materials: kraft cardstock or old Christmas cards, hole punch, twine, stamps, gold pen, pine sprigs
- Cost: about $2 to $4 for dozens
- Time: 30 minutes
19. Budget Mantel Styling
You do not need a new mantel garland every year — you need a simple formula. Start with one long garland, real or faux, draped across the mantel with gentle swags and the ends hanging down at each side. Layer in a string of warm-white fairy lights, then add height at the ends with candlesticks or lanterns and a focal point in the center, like a framed print, a mirror, or a large bow. Fill the gaps with pinecones, ornaments, and small sprigs of greenery until the mantel looks full but not crowded.
The trick is to shop your own home first. That mirror from the bedroom, those candlesticks from the dining room, and the pinecones from the yard all belong on the mantel in December. Change one element each year — new ribbon, different ornaments, a fresh color of candles — and the whole mantel feels new without buying a new garland. Step back often as you work, and take a photo: a phone photo shows gaps and lopsided spots your eyes miss in person.
- Materials: garland, fairy lights, candlesticks or lanterns, pinecones, ornaments, a mirror or framed print
- Cost: about $0 to $15 using pieces you already own
- Time: 30 minutes

20. Front Door Basket Instead of a Wreath
If wreath-making is not your thing, a front door basket is the easiest alternative and it looks wonderfully welcoming. Hang a flat-backed basket or a simple galvanized bucket on the door with a sturdy hook, fill it with a block of floral foam, and arrange faux pine branches, red berries, pinecones, and a big bow so the arrangement spills over the top. It takes ten minutes, it needs no wiring or gluing, and it looks like a florist made it.
Refresh the basket each year by swapping the bow color or adding dried oranges and cinnamon sticks, and it never looks the same twice. For a snowy look, spray the pine tips lightly with white paint before arranging them, and tuck in a few battery fairy lights for evening glow. A basket on the door also survives wind far better than a wreath on a suction hook, which makes it a smart choice for exposed front doors.
- Materials: flat-backed basket or bucket, floral foam, faux pine branches, berries, pinecones, ribbon
- Cost: about $8 to $15
- Time: 15 minutes
What You’ll Need: The Universal DIY Christmas Toolkit
Almost every project in this guide uses the same handful of tools and supplies, so gather them once and you are ready for all twenty ideas. A hot glue gun with extra sticks is the single most useful tool, followed by sharp scissors, floral wire and wire cutters, twine and ribbon in a few colors, and a roll of clear tape. Add a pack of battery tea lights and a strand of battery fairy lights, and you can light almost any decoration you make.
For materials, stock up on the cheap basics: white and kraft paper, felt in red, green, and white, Epsom salt, cinnamon sticks, pinecones, and mason jars. Most of these cost a dollar or two each at the dollar store or the craft store, and nearly all of them are reusable. Buy them once in early November, before the holiday rush, and your whole season of decorating is covered for under thirty dollars.
- Hot glue gun and extra sticks — the workhorse of Christmas crafting
- Sharp scissors and wire cutters — clean cuts make every project look neater
- Floral wire, twine, and ribbon — for hanging, tying, and finishing
- Battery tea lights and fairy lights — safe glow for every luminary and garland
- Paper, felt, Epsom salt, cinnamon sticks, pinecones, mason jars — the budget basics

How to Decorate on a Budget: 7 Money-Saving Tips
Decorating on a budget is a skill, and these seven habits will stretch every dollar. First, shop your home before you shop the store: pinecones from the yard, jars from the pantry, ribbon from last year’s gifts, and branches from the garden are all free. Second, buy after Christmas for next year — ornaments, lights, and garlands often drop to half price or less on December 26th, and a small storage box holds them until next December.
Third, pick one color palette and stick to it, so every piece you make or buy works together and nothing looks random. Fourth, invest in reusable basics — good fairy lights, a quality garland, and sturdy storage — and make the trendy pieces yourself each year. Fifth, make decorations in batches: one afternoon of pinecone ornaments fills the tree, the table, and the gift pile. Sixth, use nature: fresh pine clippings, dried oranges, and cinnamon sticks cost almost nothing and look more expensive than plastic. And seventh, remember that light is free decoration — a strand of fairy lights makes even the simplest arrangement glow, and candlelight flatters everything it touches.

Frequently Asked Questions
What are the cheapest easy DIY Christmas decorations?
Paper snowflakes, paper chain garlands, and pinecone ornaments cost one to three dollars each and need only paper, scissors, and paint. Dried orange garlands and salt dough ornaments are nearly as cheap, since most of the materials are already in your kitchen. Start with those if you are decorating on a tight budget.
How early can I start making Christmas decorations?
Dried, paper, felt, and salt dough decorations can be made any time — October or early November is ideal, since they keep for years. Fresh greenery decorations like the evergreen table runner should be made the day before you need them, since fresh pine lasts about a week indoors. Dried orange slices keep for years if stored flat and dry.

Are DIY Christmas decorations safe around kids and pets?
Yes, if you choose the right projects and the right lights. Use battery-operated tea lights and fairy lights instead of real candles, keep small items like beads and pom-poms out of reach of toddlers, and supervise hot glue gun use. Felt garlands, paper chains, and salt dough ornaments are all very kid-friendly, and pinecone trees are unbreakable.
How do I make dollar-store decorations look expensive?
Group items in odd numbers, vary the heights, and layer greenery first so no bare tray or base shows. Stick to one color palette, add a strand of fairy lights, and finish with a natural element like pinecones or cinnamon sticks. A dusting of fake snow and a good wired ribbon bow make almost any arrangement look boutique-made.
How do I store homemade Christmas decorations?
Store each type separately: garlands coiled loosely in a box with tissue paper, ornaments wrapped individually, paper snowflakes flat between sheets of paper, and salt dough ornaments in a dry box with a silica packet. Label every box, keep everything dry, and hang garlands rather than stacking heavy items on top of them.

Can I make Christmas decorations without a glue gun?
Yes. Many projects in this guide need no glue at all — paper snowflakes, paper chains, dried orange garlands, and door baskets use folding, threading, or arranging instead. Where glue helps, white craft glue or a stapler often works as a substitute; it just needs more drying time. A glue gun is worth the few dollars if you plan to craft every year, but it is never required.
Conclusion
Easy DIY Christmas decorations are proof that the best holiday homes are not the most expensive ones — they are the most personal. A paper snowflake on the window, a pinecone ornament on the tree, a glowing mason jar on the mantel: each one carries a little of your time and your taste, and together they make a home that feels warm, welcoming, and unmistakably yours. Pick one project from this list tonight, gather the few materials it needs, and make something beautiful this weekend.
Save this guide to your Christmas board, share it with the friend who says they are not crafty, and come back next year to make a few more. The decorations you make this December will come out of their boxes next December like old friends — a little worn, a little loved, and better every year. Merry Christmas, and happy crafting.

Related Reads
- DIY Christmas Wreath Ideas — 16 beautiful wreath tutorials for your front door
- Wooden Bead Christmas Garland DIY — a simple beaded garland to pair with your dried orange garland
- Dried Orange Garland Christmas — the full guide to drying and stringing orange slices
- DIY Parol Christmas Lantern — a glowing Filipino Christmas lantern you can make at home