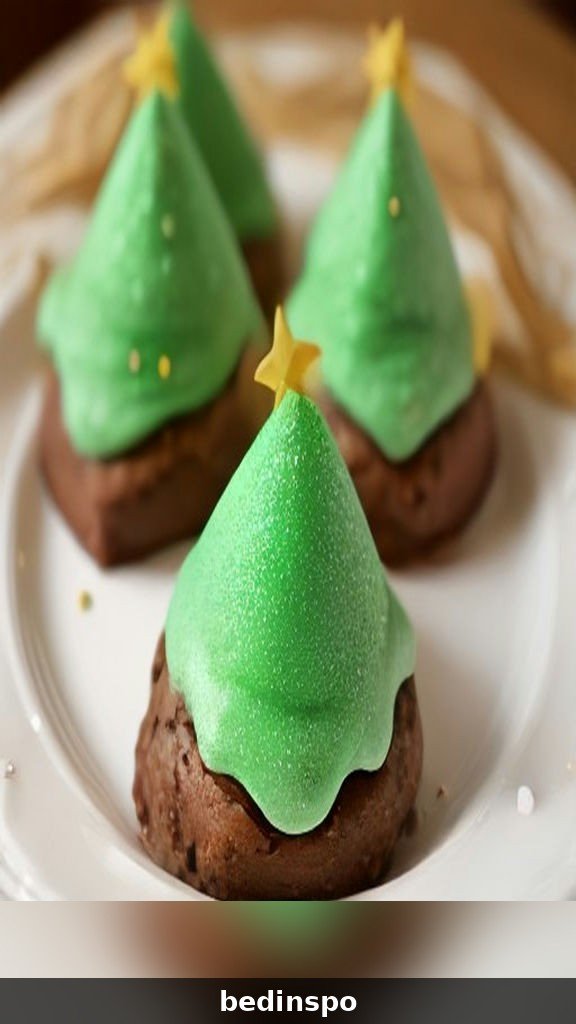
Christmas Dot Cake Cups: Festive Holiday Dessert
Some Christmas desserts are grand and dramatic — the towering layer cake, the elaborate yule log — and some are small, cheerful, and completely irresistible. Christmas dot cake cups fall firmly into that second category, and I am convinced they are one of the best holiday desserts you can make. Picture this: a clear cup filled with layers of soft vanilla cake, clouds of fluffy whipped cream, and bright pops of red and green, all crowned with a swirl of frosting covered in cheerful polka dots. They look like a party in a cup, they taste like Christmas, and they are so easy that you can make a whole batch in about an hour.
Christmas dot cake cups are individual desserts built in layers inside clear cups or small mason jars. The “dot” in the name comes from the playful polka dot frosting on top — little dots of red, green, and white icing piped or sprinkled over a swirl of buttercream or whipped cream. Underneath, the layers alternate between tender cake crumbs or cubes and silky cream, sometimes with a spoonful of jam, a sprinkle of crushed candy canes, or a handful of festive sprinkles tucked in between. Every spoonful gives you a little bit of everything, which is exactly what makes dessert cups so satisfying.
I am Huma, and I have made these cake cups for Christmas parties, school holiday celebrations, cookie exchanges, and more family movie nights than I can count. In this guide, I will show you how to build the perfect Christmas dot cake cups from scratch, including my favorite vanilla cake base, three frosting options, four ways to make the polka dots, and all the make-ahead tricks that let you assemble them the day before your party. Whether you are a confident baker or someone who prefers shortcuts, there is a version of this dessert here for you.
What Are Christmas Dot Cake Cups?
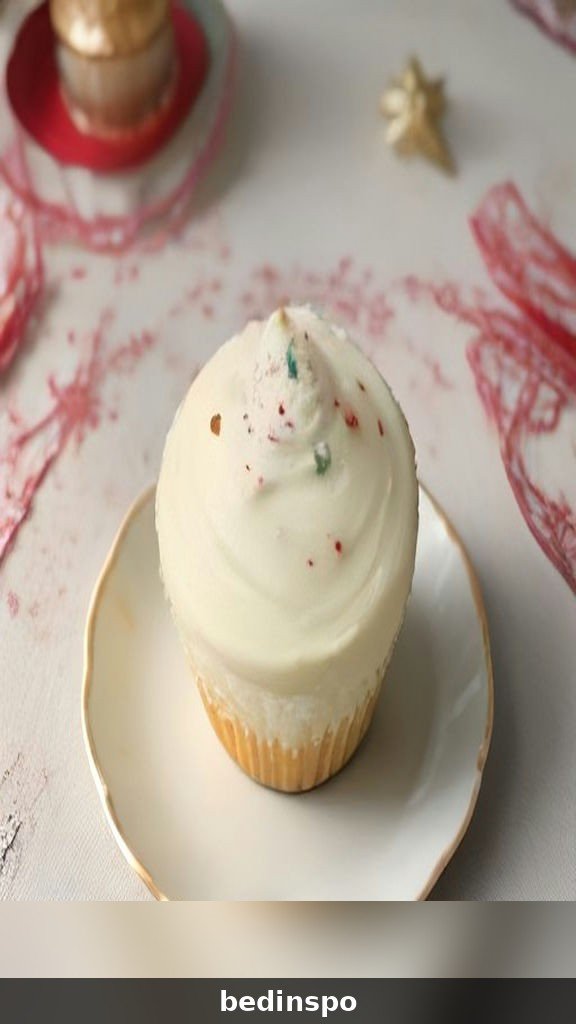
Christmas dot cake cups are a modern take on the classic trifle, scaled down into individual servings and dressed up for the holidays. Instead of one large bowl that everyone scoops from, each guest gets their own pretty cup with neat, visible layers. The clear cup is part of the charm — you can see the stripes of cake and cream through the sides, which makes the dessert look impressive before anyone even takes a bite.
The defining feature is the polka dot topping. A swirl of frosting — usually vanilla buttercream or stabilized whipped cream — gets decorated with dots in Christmas colors: red, green, and white. The dots can be piped with a small round tip, placed with sprinkles and nonpareils, or made with tiny round candies. The effect is cheerful, playful, and unmistakably festive. It is the kind of dessert that makes people smile before they even taste it, and the taste lives up to the look.
Why Cake Cups Are Perfect for Christmas Parties
Individual desserts solve so many party problems at once. There is no slicing, no serving utensils to pass around, and no half-eaten cake sitting on the table. Guests can grab a cup and mingle, kids can carry their dessert without dropping it, and the host can make exactly as many as needed. Cake cups also travel well, which makes them ideal for potlucks, office parties, and cookie exchanges where you need a dessert that survives the car ride.
They are also incredibly forgiving. Unlike a layer cake, where a slightly uneven bake or a wobbly stack can ruin the look, cake cups hide every imperfection inside the cup. The cake gets crumbled or cubed anyway, so a sunken middle or a cracked top does not matter at all. That makes this one of the most stress-free Christmas desserts you can make — and one of the most beautiful, too.

Why You Will Love These Christmas Dot Cake Cups
I have made these cake cups more times than I can count, and they are always the first dessert to disappear from the table. Here is why I think you will love them:
- Individual servings, zero slicing: Everyone gets their own perfect portion, and there is no messy cutting or serving at the party.
- Beautiful layers in every cup: The clear cups show off the stripes of cake and cream, so they look like they came from a bakery.
- Kid-friendly and crowd-pleasing: The flavors are classic vanilla, cream, and a hint of peppermint — nothing fussy, nothing polarizing.
- Make-ahead friendly: Assemble the cups up to 24 hours before your party and keep them in the fridge. The flavors actually get better as the layers meld together.
- Endlessly customizable: Swap the cake flavor, change the fillings, or adjust the colors to match any holiday theme. I have included seven variations below.
- Great for using up leftover cake: If you have leftover cake from another baking project, this is the perfect way to turn it into something new and festive.
Whether you are hosting a big Christmas party or just want a fun holiday dessert for family movie night, these Christmas dot cake cups are the answer. Let us start building them.

Ingredients for Christmas Dot Cake Cups
The ingredient list is simple, and you can use shortcuts wherever you like. I will give you the from-scratch version first, then show you the easy swaps below. This recipe makes 8 to 10 individual cups, depending on the size of your cups.
For the Vanilla Cake
- 1 1/2 cups all-purpose flour — spooned and leveled for a light, tender crumb
- 1 1/2 teaspoons baking powder — gives the cake a soft, even rise
- 1/2 teaspoon fine salt — sharpens the vanilla flavor
- 1/2 cup (1 stick) unsalted butter, softened — real butter for the richest flavor
- 1 cup granulated sugar — sweetens the cake without making it heavy
- 2 large eggs, room temperature — room temperature eggs mix more evenly into the batter
- 2 teaspoons pure vanilla extract — the star flavor of this dessert
- 3/4 cup whole milk — keeps the cake moist and tender
For the Cream Layers
- 2 cups heavy whipping cream, cold — the colder the cream, the better it whips
- 1/4 cup powdered sugar — sweetens the cream without any grittiness
- 1 teaspoon vanilla extract — a little vanilla in the cream ties everything together
- 4 ounces cream cheese, softened — optional, but it stabilizes the whipped cream so the cups hold up overnight
For the Polka Dot Frosting and Decorations
- 1 cup unsalted butter, softened — for the buttercream topping
- 3 cups powdered sugar, sifted — sifting keeps the buttercream silky smooth
- 2 tablespoons heavy cream or milk — thins the buttercream to a pipeable consistency
- 1 teaspoon vanilla extract — for flavor in the frosting
- Gel food coloring in red and green — for the polka dots and tinted cream layers
- Red, green, and white nonpareils and round sprinkles — the easiest way to make polka dots
- Festive sprinkles, crushed candy canes, and mini star sprinkles — for extra holiday sparkle
- Clear plastic cups or small mason jars (8 to 9 ounces) — clear cups show off the layers best
That is everything you need. You probably have most of the baking ingredients already, and the decorating supplies are easy to find at any grocery or craft store in December. Keep reading for the step-by-step method.

Tools You Will Need
Cake cups are one of the simplest desserts to assemble, and the tools are basic. Here is what I use every time.
Essential Tools
- 9×13-inch baking pan — a sheet cake is the easiest shape to cube or crumble for cups
- Parchment paper — lining the pan makes the cake easy to lift out and cut
- Stand mixer or hand mixer — for the cake batter, the whipped cream, and the buttercream
- Clear cups or mason jars — 8 to 9 ounce cups are the perfect single-serving size
- Piping bags and a star tip (Wilton 1M) and a small round tip (#3) — for the frosting swirl and the polka dots
- Small spoons or a cookie scoop — for neat, even layers in the cups
- A long-handled teaspoon — for serving, and for tidying the layers as you build them
That is really all there is to it. No special molds, no fancy equipment — just a baking pan, a mixer, and some pretty cups. If you do not have piping bags, a zip-top bag with the corner snipped works perfectly well for both the frosting and the dots.

How to Make Christmas Dot Cake Cups Step by Step
Here is the full process, broken into three stages: bake the cake, whip the cream and make the frosting, then build the cups. You can do all three stages in one afternoon, or bake the cake a day ahead and assemble the cups the next day.
Step 1: Bake the Vanilla Cake
Preheat your oven to 350°F (175°C) and line a 9×13-inch baking pan with parchment paper, leaving a little overhang on the sides so you can lift the cake out easily. In a medium bowl, whisk together the flour, baking powder, and salt. In the bowl of a stand mixer, beat the softened butter and granulated sugar on medium speed for 2 to 3 minutes, until light and fluffy. Add the eggs one at a time, beating well after each, then mix in the vanilla extract. Add the flour mixture in three additions, alternating with the milk in two additions, beginning and ending with the flour. Mix just until combined — overmixing makes a tough cake. Pour the batter into the prepared pan, smooth the top, and bake for 25 to 30 minutes, until a toothpick inserted in the center comes out clean and the top springs back when lightly pressed. Let the cake cool in the pan for 10 minutes, then lift it out and let it cool completely on a wire rack.
Step 2: Whip the Cream
While the cake cools, make the whipped cream. If you are using the cream cheese, beat it first in a clean mixer bowl until smooth, then add the cold heavy cream, powdered sugar, and vanilla. Beat on medium-high speed until medium-stiff peaks form — the cream should hold its shape on the whisk but still look soft and billowy. Be careful not to overbeat, or the cream will turn grainy. If you are skipping the cream cheese, simply whip the cream, powdered sugar, and vanilla together. Transfer the whipped cream to a piping bag or a bowl, cover, and refrigerate until you are ready to assemble.

Step 3: Make the Polka Dot Buttercream
In a clean mixer bowl, beat the softened butter on medium speed for 2 minutes until creamy and pale. Add the sifted powdered sugar one cup at a time, beating on low speed at first so the sugar does not fly everywhere, then increasing to medium. Add the heavy cream and vanilla, and beat for 2 to 3 minutes until the buttercream is light, fluffy, and easy to pipe. Divide the buttercream into three bowls. Leave one bowl white, tint one red, and tint one green, using gel food coloring a little at a time until the colors are bright and cheerful. Transfer the white buttercream to a piping bag fitted with a star tip, and transfer the red and green buttercream to small piping bags fitted with round tips.
Step 4: Cut the Cake into Cubes
Once the cake is completely cool, cut it into small cubes about 3/4 inch across. You do not need to be precise — slightly uneven cubes actually layer more interestingly in the cups. You will have more cake than you need for 8 to 10 cups, which is fine; the extra cubes are the baker’s snack, or you can freeze them for another batch of cake cups later. If you prefer a softer, more trifle-like texture, crumble the cake into bite-sized pieces instead of cubing it.
Step 5: Build the Layers
Now for the fun part. Place a layer of cake cubes in the bottom of each cup, pressing them gently into an even layer. Spoon or pipe a layer of whipped cream over the cake, spreading it to the edges so the stripes show through the cup. Add a sprinkle of festive sprinkles or a spoonful of jam if you like, then repeat: another layer of cake, another layer of cream. Two layers of each is the classic build, but three thin layers look even more impressive in a taller cup. Leave about an inch of space at the top for the frosting swirl.
Step 6: Pipe the Frosting Swirl and Add the Dots
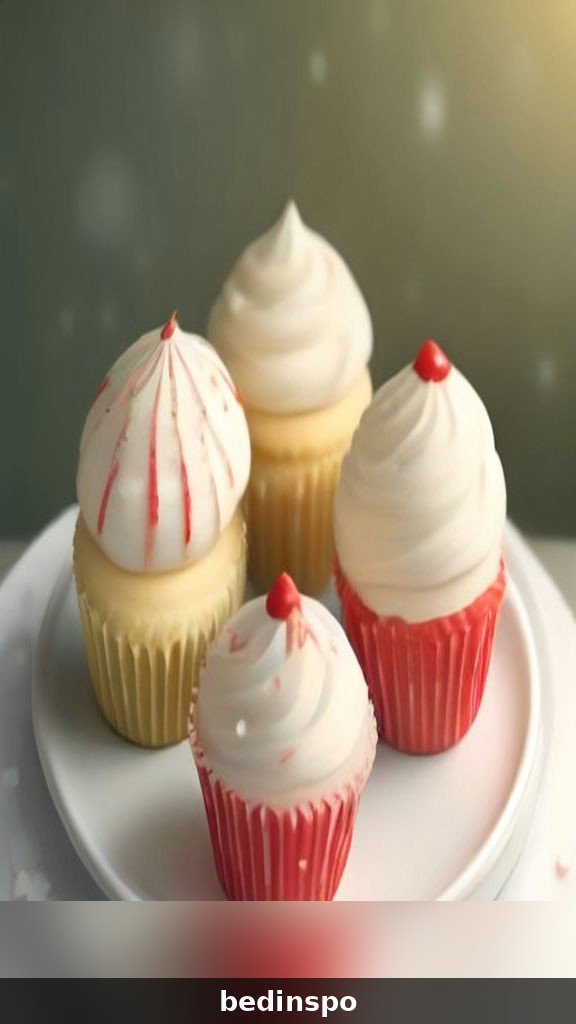
Pipe a generous swirl of white buttercream on top of each cup, starting at the outer edge and spiraling up to a peak in the center. Then pipe small dots of red and green buttercream all over the swirl — vary the sizes and placement so it looks playful, like confetti. Finish with a sprinkle of red, green, and white nonpareils, a pinch of edible glitter, and a tiny star sprinkle on the very top. The finished cups should look like little Christmas trees topped with ornaments, or like a swirl of snow dotted with holiday color.
Step 7: Chill Before Serving
Cover the finished cups loosely with plastic wrap and refrigerate for at least 1 hour, or up to 24 hours, before serving. Chilling lets the flavors meld together — the cream softens the cake slightly, the layers settle, and the whole dessert tastes more cohesive. Take the cups out of the fridge about 15 minutes before serving so the buttercream softens to the perfect texture. Serve with a small spoon in each cup, and watch them disappear.
Tips for Perfect Christmas Dot Cake Cups Every Time
Cake cups are forgiving, but a few good habits will take yours from good to bakery-worthy. These are the tips I share with everyone who asks for the recipe.
Cool the Cake Completely Before Cutting
This is the most important tip in the whole recipe. Warm cake crumbles into mush when you try to cube it, and it will melt your whipped cream on contact. Let the cake cool for at least an hour, or bake it the day before and store it wrapped in plastic wrap at room temperature. A fully cooled cake cuts into clean, neat cubes that hold their shape in the cup and soak up just the right amount of cream.
Keep Everything Cold When Whipping Cream
Whipped cream is at its best when everything is cold. Chill your mixing bowl and whisk attachment in the freezer for 15 minutes before you start, and use cream straight from the fridge. Cold cream whips faster, holds its peaks longer, and is much less likely to turn grainy or separate. If your kitchen is warm, whip the cream in the coolest part of the house, or set the mixing bowl inside a larger bowl of ice water while you beat it.

Use Clear Cups for Maximum Impact
The whole point of a cake cup is that you can see the layers, so clear cups are not just nice — they are essential to the look. Clear plastic cups are inexpensive, lightweight, and perfect for parties. Small mason jars are prettier and reusable, and they make lovely gifts. Avoid opaque cups or paper cups, which hide the layers and defeat the purpose. If you are serving these at a fancy dinner, small glass dessert cups or stemless wine glasses look absolutely stunning.
Do Not Overfill the Cups
It is tempting to pile the layers high, but overfilled cups are hard to eat and harder to transport. Leave about an inch of space at the top for the frosting swirl, and keep the layers level so the stripes look neat through the glass. A cookie scoop or a small measuring spoon helps you portion the cake and cream evenly across all the cups, so every guest gets the same generous serving.
4 Ways to Make the Polka Dots
The dots are the signature of this dessert, and there are several ways to create them. Each method gives a slightly different look, so pick the one that matches your style and your supplies.
1. Piped Buttercream Dots
The classic method is to pipe small dots of tinted buttercream directly onto the frosting swirl using a small round tip. Vary the sizes — some big, some tiny — and cluster them in groups for a playful, confetti-like effect. This method gives you the most control over the colors and placement, and the dots taste like frosting, which everyone loves.
2. Nonpareils and Round Sprinkles
The easiest method is also one of the prettiest. While the frosting swirl is still soft, press red, green, and white nonpareils and round sprinkles into the buttercream. The tiny spheres read as perfect polka dots, they add a delightful crunch, and they take seconds to apply. This is my go-to method when I am making a big batch or baking with kids.

3. Candy Dots and Mini M&Ms
For a bolder look, place mini red and green M&Ms, candy-coated chocolate dots, or small round gummies onto the frosting. The candies are bigger and brighter than sprinkles, they add a fun pop of color, and kids love picking them off the top. This method is especially good for a children’s Christmas party, where the candy dots double as a treat on top of a treat.
4. Tinted Cream Layers as Dots
For a more subtle, elegant effect, tint small portions of the whipped cream red and green, then pipe tiny dots of the tinted cream onto the white frosting swirl. The dots are soft and delicate, and they blend beautifully with the cream layers inside the cup. This method works best when you are serving the cups the same day, since whipped cream dots soften faster than buttercream dots.
7 Christmas Dot Cake Cup Variations to Try
Once you have the basic technique down, the variations are endless. Here are seven of my favorite twists on the classic recipe.
1. Chocolate Peppermint Dot Cake Cups
Swap the vanilla cake for chocolate cake, add a half teaspoon of peppermint extract to the whipped cream, and top with crushed candy canes and red and white dots. This version tastes like a candy cane hot chocolate in dessert form, and it is the most requested variation at my house every December.
2. Red Velvet Dot Cake Cups
Use a red velvet cake base with cream cheese whipped cream and white chocolate dots. The deep red cake against the white cream is stunning through the clear cup, and the tangy cream cheese frosting balances the sweetness perfectly. This is the most elegant version, and it is beautiful on a Christmas dinner table.

3. Gingerbread Dot Cake Cups
Use a spiced gingerbread cake, layer it with vanilla whipped cream and a spoonful of caramel sauce, and top with gold and white dots. The warm spices — ginger, cinnamon, and cloves — taste like Christmas itself, and the caramel adds a rich, buttery note that makes this version feel extra special.
4. Eggnog Dot Cake Cups
Replace the milk in the cake with eggnog, add a pinch of nutmeg to the whipped cream, and top with white and gold dots. This version is creamy, spiced, and wonderfully festive. It is a great choice for an adult holiday party, and it pairs beautifully with a glass of actual eggnog.
5. Strawberry Santa Dot Cake Cups
Layer vanilla cake with fresh sliced strawberries and whipped cream, then top with red and white dots and a tiny strawberry on top. The red and white theme is classic Santa, the fresh berries lighten the dessert, and this version is a hit with anyone who prefers fruit desserts to chocolate ones.
6. Hot Cocoa Dot Cake Cups
Use chocolate cake, layer it with marshmallow whipped cream, and top with mini marshmallows and white and red dots. Every spoonful tastes like the best mug of hot cocoa, and the mini marshmallows on top are irresistibly cute. This is the coziest version, and kids absolutely love it.
7. Cranberry White Chocolate Dot Cake Cups
Layer vanilla cake with white chocolate whipped cream and a spoonful of cranberry sauce or cranberry jam, then top with red and white dots and a few sugared cranberries. The tart cranberries cut through the sweetness of the white chocolate, and the red and white colors are perfectly festive. This is the most sophisticated version, and it is wonderful for a holiday dinner party.

How to Store Christmas Dot Cake Cups
Proper storage keeps your cake cups fresh, pretty, and safe to eat. Once assembled, cover the cups loosely with plastic wrap — you do not want the wrap touching the frosting swirls — and refrigerate them. They will stay fresh for up to 3 days in the fridge, though they look and taste their best in the first 24 hours. The cake softens slightly as it absorbs moisture from the cream, which most people actually prefer.
A few storage notes: keep the cups level in the fridge so the layers do not shift, and store them away from strong-smelling foods like onions, since cream absorbs odors easily. If you are transporting the cups, place them in a muffin tin or a box with dividers so they do not tip over in the car. And always keep cake cups refrigerated — the whipped cream and buttercream need to stay cold for food safety.
Can You Freeze Christmas Dot Cake Cups?
You can freeze the components, but not the fully assembled cups. Freeze the baked cake, wrapped tightly in plastic wrap and foil, for up to 3 months. Thaw it at room temperature, then cube it and assemble the cups fresh. The whipped cream and buttercream do not freeze well — they can separate and turn grainy when thawed — so always make the cream and frosting fresh on the day you assemble the cups. This approach still saves you a lot of time, since the cake is the most time-consuming part.

Make-Ahead Timeline for Stress-Free Holidays
The holidays are busy enough without last-minute dessert stress, so here is a simple timeline for making Christmas dot cake cups ahead of time. Up to 3 months before: Bake the cake, cool it completely, wrap it tightly, and freeze it. Up to 3 days before: Thaw the frozen cake in the fridge overnight, or bake a fresh cake and store it wrapped at room temperature. 1 day before your event: Whip the cream, make the buttercream, and assemble the cups. Cover and refrigerate overnight. Day of: Add the final sprinkles and decorations, take the cups out of the fridge 15 minutes before serving, and enjoy. Because the cups actually improve with an overnight chill, this is one of the easiest desserts on your entire holiday menu to plan around.
Christmas Dot Cake Cups for Parties and Gifts
These cake cups are one of the best desserts you can make for a Christmas party, because they solve the serving problem and look gorgeous at the same time. Arrange them on a tiered cake stand or a pretty tray, and they become the centerpiece of the dessert table. Guests can grab a cup and keep mingling, which is exactly what you want at a holiday party. Make a few extra, because people always ask for seconds — and for the recipe.
For a cookie exchange or a potluck, pack the cups in a muffin tin lined with festive cupcake liners. The muffin tin keeps them upright during transport, and the liners add a pop of color. Tie a ribbon around the tin handle, and you have a gift that looks like it came from a bakery. If you are giving cake cups as individual gifts, use small mason jars with lids, tie a ribbon around the neck, and attach a gift tag. A mason jar cake cup is a present and a dessert in one, and people love receiving them.
They also work beautifully as a kids’ party activity. Set up a cake cup bar with bowls of cake cubes, whipped cream, sprinkles, and candies, and let each child build their own cup. It is messy, joyful, and delicious — and every child goes home proud of the dessert they made. Just have plenty of napkins on hand, and assemble the cups on a table covered with a plastic tablecloth for easy cleanup.

Serving Ideas for Holiday Gatherings
Christmas dot cake cups are versatile enough to fit any kind of gathering. For a formal Christmas dinner, serve them in small glass dessert cups or stemless wine glasses, with a gold spoon and a sprig of fresh mint on top. The elegant presentation elevates the simple dessert, and the individual servings feel special and thoughtful.
For a casual family gathering or a movie night, serve them in clear plastic cups with a candy cane tucked into each one as a stirrer and a garnish. The candy cane adds a peppermint crunch and looks adorable poking out of the frosting. For a school party or an office party, use small mason jars with lids so guests can take their dessert home if they cannot finish it at the party. However you serve them, put the cups somewhere visible — they are too pretty to hide in the kitchen.
You can also set up a dessert table with several flavors of dot cake cups side by side: vanilla, chocolate peppermint, and red velvet, for example. Label each flavor with a cute tag, and let guests choose their favorite — or try all three. A trio of cake cup flavors makes a dessert table feel abundant and generous, and it gives guests something to talk about.
Troubleshooting Common Cake Cup Problems
Cake cups are forgiving, but a few things can go wrong. Here are the most common problems and how to fix them.
Why Did My Whipped Cream Turn Grainy?
Grainy whipped cream usually means it was overbeaten. Once the cream reaches medium-stiff peaks — it holds its shape but still looks soft and smooth — stop beating. If it does turn grainy, you can sometimes rescue it by folding in a few tablespoons of cold, unwhipped cream with a spatula until it smooths out. To prevent the problem, beat the cream on medium speed rather than high, and watch it closely in the last minute.
Why Are My Layers Slipping or Sliding?
Sliding layers usually mean the cream was too soft or the cake cubes were too large. Use medium-stiff whipped cream that holds its shape, and cut the cake into small, even cubes that pack together neatly. Press each layer gently into place with the back of a spoon so there are no air gaps. And always chill the assembled cups for at least an hour before serving — the cold firms everything up and locks the layers in place.
Why Did My Buttercream Dots Melt or Lose Their Shape?
Buttercream dots melt when the kitchen is too warm or when the cups sit out at room temperature for too long. Pipe the dots onto a chilled frosting swirl, and keep the finished cups refrigerated until 15 minutes before serving. If your kitchen is very warm, use a slightly stiffer buttercream with a little less cream, and work quickly. You can also chill the piped dots in the fridge for 15 minutes before adding the sprinkles.
Why Does My Cake Taste Dry in the Cups?
Dry cake in a cup usually means the cake was overbaked or the layers did not have enough cream. Bake the cake until a toothpick comes out clean, but no longer — even a few extra minutes can dry it out. Make sure each cake layer is fully covered with cream, since the cream is what keeps the cake moist. If your cake still tastes dry, brush the cubes lightly with a simple syrup or a little milk before layering them. An overnight chill in the fridge also helps, since the cream softens the cake as it sits.
Frequently Asked Questions About Christmas Dot Cake Cups
Got questions? I have answers! Here are the most common questions I hear about making Christmas dot cake cups at home.
Can I use a boxed cake mix for Christmas dot cake cups?
Absolutely! A boxed vanilla or white cake mix works wonderfully in this recipe and saves a lot of time. Bake it according to the package directions in a 9×13-inch pan, let it cool completely, and cube it just as you would a homemade cake. To make a boxed mix taste more homemade, swap the water for whole milk, add an extra egg, and use melted butter instead of oil. Nobody will ever know the difference once it is layered with cream and frosting.
Can I make Christmas dot cake cups without dairy?
Yes, with a few swaps. Use a dairy-free cake recipe or a dairy-free boxed mix, whip coconut cream instead of heavy cream, and make the buttercream with dairy-free butter. Coconut whipped cream is delicious in this dessert and adds a subtle tropical note that pairs nicely with vanilla. Just be sure to chill the cans of coconut cream overnight so the cream separates from the liquid and whips properly.
How far in advance can I make Christmas dot cake cups?
You can assemble the cups up to 24 hours before your event and keep them refrigerated. In fact, they taste even better after an overnight chill, since the flavors meld together and the cream softens the cake. I do not recommend assembling them more than 24 hours ahead, because the cake can get too soft and the frosting can start to look tired. The cake itself can be baked up to 3 days ahead and stored at room temperature, or frozen for up to 3 months.
Are Christmas dot cake cups good for kids?
They are one of the best Christmas desserts for kids. The flavors are simple and sweet, the individual cups are easy for small hands to hold, and the polka dot decorations are irresistible to children. Kids also love helping to build the cups — layering the cake, spooning the cream, and placing the sprinkles is a perfect holiday activity. Just be aware of food allergies, especially dairy and egg, and use plastic cups instead of glass for younger children.
Can I make Christmas dot cake cups gluten-free?
Yes, you can use a good 1-to-1 gluten-free flour blend in the cake, or start with a gluten-free boxed cake mix. Look for a blend that contains xanthan gum, which helps the cake hold together when cubed. The whipped cream, buttercream, and most sprinkles are naturally gluten-free, but always check the labels on your sprinkles and food coloring to be sure they are certified gluten-free.
What size cups should I use for cake cups?
Eight to nine ounce clear plastic cups or small mason jars are the ideal size for a single serving — big enough to feel generous, small enough that guests can finish one without feeling overwhelmed. For a dessert table with many options, use smaller 5 to 6 ounce cups so guests can try several desserts. For a main dessert at a dinner party, a 9 ounce cup with a full swirl of frosting feels just right.
How do I keep the frosting swirl from sliding off?
The frosting swirl stays put when the top cream layer is firm and the cups are chilled. Pipe the swirl onto a cold cup — if the cream layer is still soft, the buttercream can slide. Press the swirl gently into the cream layer as you pipe it so it has something to grip. Then refrigerate the cups for at least an hour before serving so everything firms up together. Avoid leaving the cups in a warm room for more than 30 minutes.
Final Thoughts
And there you have it — everything you need to make Christmas dot cake cups that look like a holiday party in a cup and taste even better than they look. They are creamy, fluffy, festive, and fun, with those cheerful polka dots on top that make everyone smile. Whether you make the classic vanilla version or try one of the variations like chocolate peppermint or red velvet, these cake cups are guaranteed to be the dessert everyone remembers.
I would love to hear how your Christmas dot cake cups turn out! Did you go with the classic vanilla, or did you try the gingerbread or hot cocoa version? However you make them, I hope these little cups of Christmas bring a little extra joy to your holiday table this year. Merry Christmas, happy layering, and do not forget the dots — after all, that is what makes them dot cake cups.
If you loved these Christmas dot cake cups, you will also enjoy these festive holiday treats from the blog:
- Snowball Cookies Recipe — buttery melt-in-your-mouth cookies rolled in powdered sugar
- Christmas Crack Recipe — the famously addictive saltine toffee bark everyone fights over
- Pecan Pie Bark Recipe — all the flavor of pecan pie in an easy no-bake bark
- Hot Cocoa Bombs Recipe — magical chocolate spheres that melt into the coziest hot cocoa